
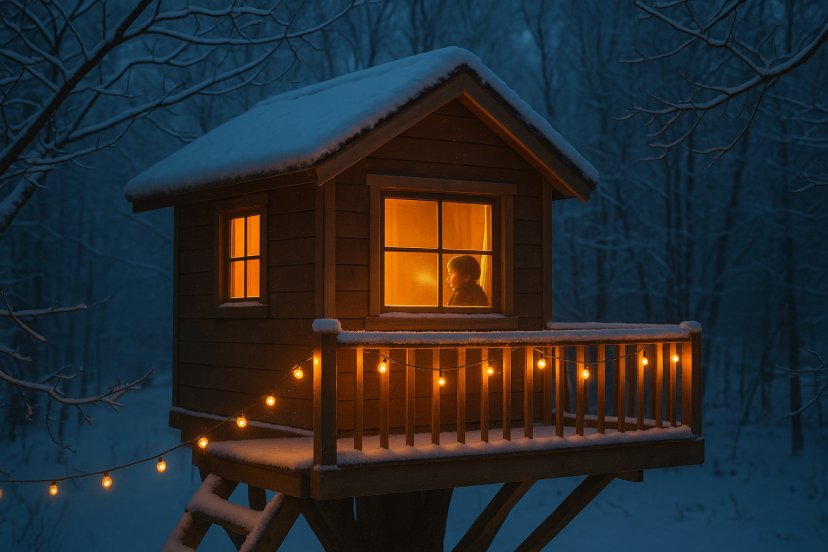
DIY Treehouse Winter Prep: 5 Insulation Tips & Coziness Hacks
We may earn a commission for purchases made using our links. Please see our disclosure to learn more.
If you’ve ever stepped into your treehouse on a chilly morning and felt that instant “brrr,” you’re not alone. The good news? A few smart insulation tips can turn that drafty hideout into a snug winter retreat—without losing its magic. In this friendly guide, you’ll learn how to seal sneaky air leaks, boost window warmth, pick the right materials (hello, R-value), fight condensation, and layer in low-cost cozy upgrades.
Affiliate note: This guide may mention products we like; some links can be affiliate links at no extra cost to you.
Why Insulation Tips Matter for a Treehouse
Your treehouse isn’t a full-blown house—but physics still applies. Warm air escapes, cold air creeps in, and wind loves a loophole. With a few targeted fixes—weatherstripping, window insulation film, foam board, and radiant barrier layers—you can noticeably reduce drafts, protect wood from condensation, and make the whole space more comfortable for reading, crafts, and stargazing.
Quick Safety Notes Before You Start
- Heat sources in elevated wooden structures demand extra caution. Follow manufacturer clearances and never leave heaters unattended.
- Ventilation matters. Air-tight doesn’t mean oxygen-tight—plan for controlled, safe airflow.
- Moisture control is as essential as heat control. Pair sealing with vapor barrier logic and venting to avoid damp corners.
Tip #1: Seal Air Leaks Like a Pro (Weatherstripping & Caulk)
Air sealing is your fastest win. Target gaps around doors, hatches, window sashes, and where siding meets trim.
How to do it (quick start):
- Draft hunt: On a breezy day, feel for leaks with the back of your hand or a lit incense stick (watch for smoke movement).
- Weatherstrip doors/windows: Foam or rubber seals compress to block drafts and reduce heat loss.
- Caulk the still parts: Use paintable exterior caulk for trim seams and interior acrylic latex for small cracks.
When done right, sealing and insulating can deliver meaningful energy savings in homes; the same principles help small structures like treehouses feel warmer and less drafty.
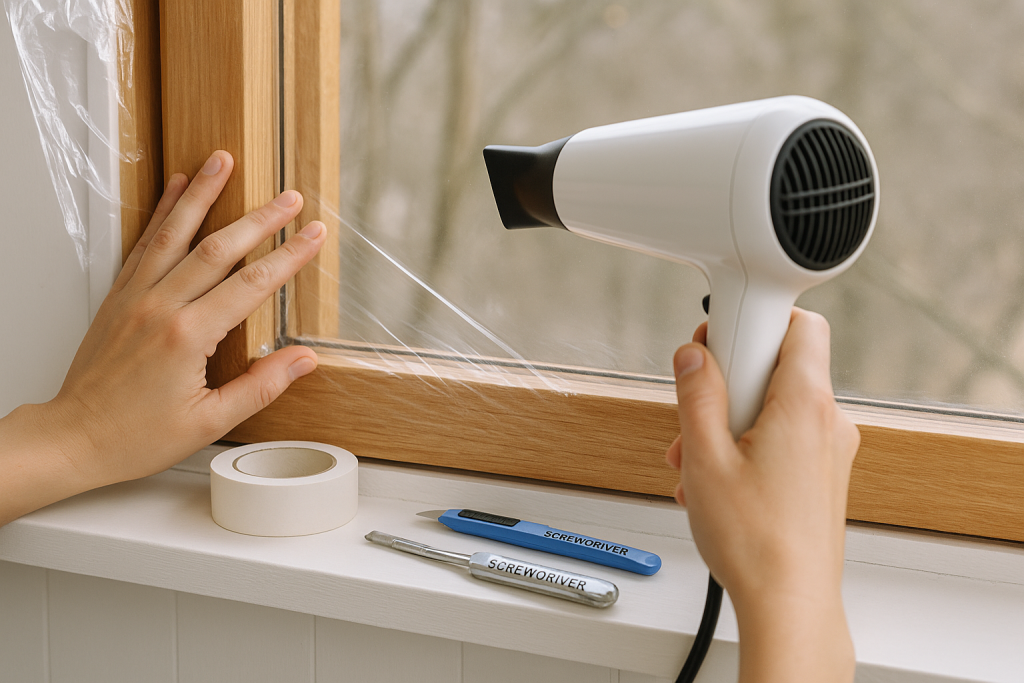
Tip #2: Add Window Insulation Film for Instant Draft Control
Clear shrink film over leaky panes is like putting a windbreaker on your windows. It reduces air infiltration and creates an insulating air gap. Simulation studies on high-performance window films in buildings have shown real potential for reducing heating and cooling loads—useful context as you choose your approach for a small space.
Smooth install basics
- Clean frame → apply double-sided tape → press film → warm gently with a hair dryer to tighten.
- Work from top to bottom to avoid wrinkles.
- Keep a spare panel for mid-winter touch-ups.
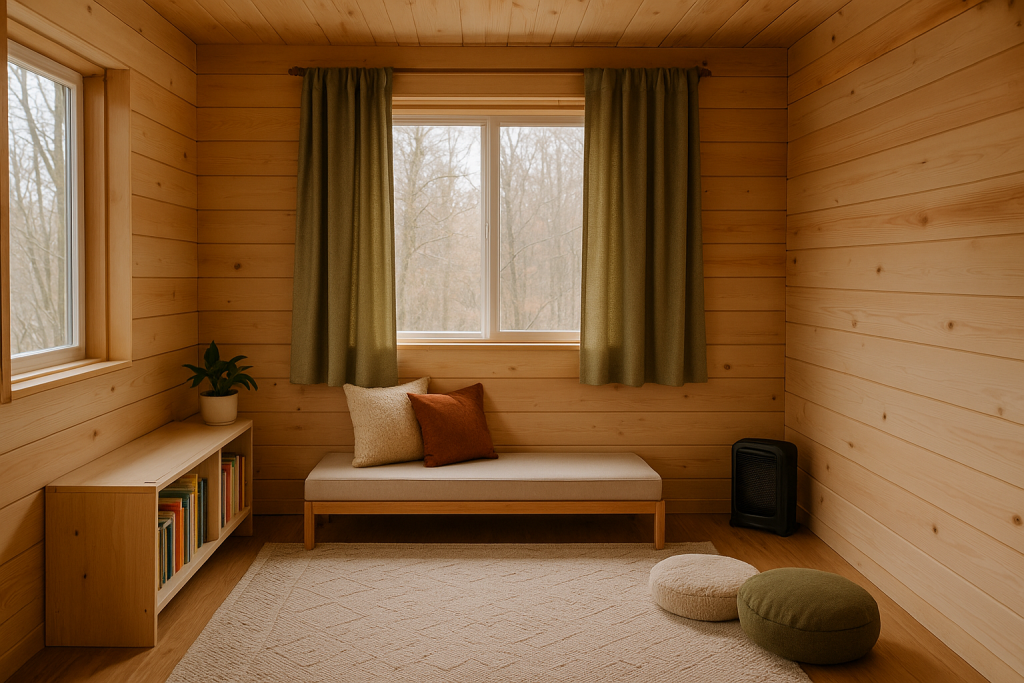
Tip #3: Upgrade Soft Surfaces (Thermal Curtains, Rugs, Draft Stoppers)
Think of textiles as cozy armor. Thermal curtains over windows and rugs over plank floors cut the “cold radiance” you feel from glass and boards. Tightly fitted cellular shades (or insulated curtains) can reduce heat loss through windows and trim heating energy use in homes—again, the physics helps your treehouse, too.
Fast layering ideas
- Thick rug + rug pad to reduce floor chill.
- Weighted draft stopper along the door threshold.
- Curtain rod wider than the window to hug the wall and trap less cold air at the edges.
Tip #4: Insulate Walls & Roof (Foam Board + Reflective Layers)
For lightweight structures, rigid foam board (polyiso, XPS) gives good R-value per inch and cuts easily. In cold, windy spots, add a radiant barrier (e.g., reflective bubble roll) facing an air gap to help with radiant heat. Remember: R-value shows how strongly a material resists heat flow—higher numbers insulate better.
Smart layering, simple rules
- Outside in: Sheathing (if any) → foam board → taped seams → thin interior cladding (ply or beadboard).
- Keep a small, intentional vent path near the roof peak to let moist air escape.
- Seal every seam with compatible foil or acrylic tape.
Tip #5: Mind the Floor (Underlayment, Rugs, Foam Mats)
Elevated floors shed heat. Add rigid foam board between joists or lay dense foam underlayment beneath a rug. Even interlocking gym mats help for play zones. You’ll feel the difference the moment you sit on the floor to build LEGO towers.

Stop Condensation: Vent Smart, Seal Smart
Warm interior air meets cold surfaces and—poof—tiny droplets. That’s why we pair air sealing with controlled ventilation.
- Create a high vent (ridge/soffit gap or discreet louver).
- Avoid trapping shower-level humidity (no boiling kettles inside).
- If the treehouse has windows, crack them slightly during busy playtime to purge moisture.
Build a Simple Winterization Checklist
- Weatherstrip door + windows
- Film over the leakiest panes
- Draft stopper installed
- Foam board in walls/roof where possible
- Rugs + thermal curtains hung
- Vent path confirmed
- Perimeter gaps foamed or caulked
- Quick sweep for new cracks after the first cold snap
Budget & Time: What to Do in a Weekend
Day 1 (AM): Draft hunt, buy supplies.
Day 1 (PM): Weatherstrip doors/windows, caulk stationary gaps.
Day 2 (AM): Install window film, add draft stoppers, hang curtains.
Day 2 (PM): Add rugs/underlayment; if skilled, cut and fit foam board panels.
Common Mistakes to Avoid
- Sealing without venting: Trapped moisture is not cozy.
- Ignoring the floor: It’s a giant cold plate if left bare.
- Skipping tape: Untaped foam seams leak heat.
- Overloading walls: Keep materials light for tree health and structural safety.
🔹 Amazon Picks: Affordable Treehouse Insulation Helpers
1) Frost King V83/3 Heavy Duty Shrink Window Kit, 42″ × 62″ (3-Pack)
What it is: Clear shrink film to reduce drafts and add an insulating air gap over windows.
Features: Film + double-sided tape; tighten with hair dryer; sized for standard panes.
Pros: Quick warmth boost; low cost; renter-friendly.
Cons: Single-season film; can wrinkle if overheated.
Best for: Rapid difference on the coldest window.
Review snapshot: Shoppers often praise the immediate drop in drafts after install.
2) Duck Brand Self-Adhesive Foam Weatherstrip Seal (285645), 20 ft
What it is: Compressible foam gasket for doors and windows.
Features: Self-adhesive; 3/8″ W × 5/16″ T; two 10-ft rolls.
Pros: Easy DIY; seals uneven gaps well.
Cons: Adhesive may need clean surfaces; replace every season or two.
Best for: Leaky sashes and door frames.
Review snapshot: Frequently lauded for fast draft control on a small budget.
3) Great Stuff “Gaps & Cracks” Insulating Foam Sealant, 12 oz
What it is: Expanding spray foam for holes and frames.
Features: Tack-free ~6 min; trim after cure; interior/exterior use.
Pros: Seals odd-shaped openings; durable.
Cons: Can be messy; wear gloves; not for big structural voids.
Best for: Gaps around pipes, wiring, or the door jamb.
Review snapshot: Praised for “set it and forget it” air sealing.
4) Reflectix BP24025 Reflective Insulation, 24″ × 25′
What it is: Lightweight radiant barrier/bubble roll.
Features: Seven-layer construction; easy to cut and staple; fiber-free.
Pros: Great for lightweight builds; useful behind interior panels.
Cons: Needs an air gap; not a traditional high-R blanket by itself.
Best for: Roof panels and south-facing walls.
Review snapshot: DIYers like the weight-to-benefit ratio and clean install.
5) NICETOWN Thermal Insulated Blackout Curtains (pair)
What it is: Heavy curtains that insulate and reduce glare.
Features: Triple-weave fabric; light blocking; multiple sizes/colors.
Pros: Immediate comfort upgrade; doubles as design accent.
Cons: Requires a sturdy rod; works best when sized wide and tall.
Best for: Sleep/reading corners and big, bright windows.
Review snapshot: Often praised for better sleep and noticeable temperature control.
Side-by-Side Comparison
| Model | Key Spec(s) | Warranty | Approx Price/Tier | Best For |
| Frost King V83/3 Window Film Kit | 3 sheets, 42″×62″; tape included | Varies by seller/manufacturer | Budget | Quick window draft fix |
| Duck Brand Foam Weatherstrip (285645) | 3/8″ W × 5/16″ T; 20 ft total | Varies | Budget | Doors & window sashes |
| Great Stuff Gaps & Cracks 12 oz | Expands to fill small voids; trims after cure | Varies | Budget | Holes around pipes/jambs |
| Reflectix BP24025 | 24″×25′; reflective bubble | Varies | Mid | Light, radiant barrier layer |
| NICETOWN Thermal Curtains | Pair; triple-weave blackout | Varies | Mid | Cozy window coverage |
(Prices and availability change; check each listing.)
🧪 Credibility Corner: What the Research Says
You don’t have to guess—there’s solid guidance behind these insulation tips.
- Sealing + insulating saves energy: The ENERGY STAR® methodology and a 2024 Insulation Factsheet note that sealing leaks and adding insulation can cut heating and cooling energy use by around 15% on average in homes—principles that scale down to small structures, too.
- Films and coverings help at the glass: A 2019 MDPI study on window films reported reduced heating and cooling consumption in buildings when certain films were applied—useful context for choosing film or insulated coverings in a treehouse. The DOE Energy Saver guidance also shows cellular shades can reduce window heat loss and trim heating energy.
Bonus: Keep the Fun Going with a Sturdy Play Add-On
Once the inside is warm and welcoming, think about the rest of your backyard flow. A safe, engaging play setup pairs beautifully with a winter-ready hideout—check out this kid-friendly swing set guide for ideas on layouts and safety details that complement your treehouse.
FAQs: Your Treehouse Insulation Questions, Answered
How can I winterize a treehouse without adding much weight?
Use lightweight materials: Reflective insulation with air gaps, thin foam board panels, weatherstripping, and window film. Finish with rugs and curtains for comfort without structural overload.
What’s a good R-value for thin panels in a small structure?
Aim for the highest R-value per inch you can reasonably install (rigid foam boards often outperform fiberglass in thin builds). Focus on sealing first; air leaks undermine any R-value gains.
Will sealing everything cause moisture problems?
Not if you add controlled ventilation. Create a small high vent path (or use operable windows) to release humid air. Pair sealing with vapor-aware layering so moisture can’t condense on cold surfaces.
Are thermal curtains really worth it?
Yes—layering matters. Insulated curtains or cellular shades can cut window heat loss and make seating areas feel less “cold-to-the-touch.” They also block glare for cozy reading time.
What’s the fastest “one-hour fix” for a freezing day?
Install a draft stopper and weatherstrip the door, then apply window film to the draftiest pane. Add a thick rug underfoot. You’ll feel it immediately.
Wrap-Up: Cozy, Safe, and Winter-Ready
Winter comfort isn’t a mysterious art—it’s a handful of insulation tips done well. Seal the leaks you can see (and the ones you can’t), cover the glass thoughtfully, add slim insulation layers where feasible, and keep moisture moving the right way. With a couple of weekend sessions, your treehouse can go from “beautiful but brisk” to “bring a book and stay awhile.”
You’ve got this—and when the first frost sparkles on the branches and your little hideaway still feels warm, you’ll be glad you started today.