How To Winter-proof Your Treehouse
We may earn a commission for purchases made using our links. Please see our disclosure to learn more.
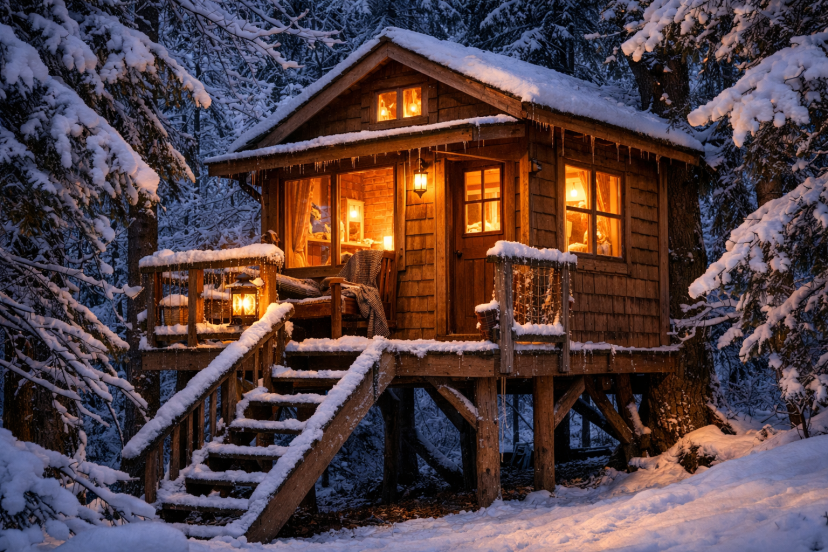
The dream is easy to picture: snow outside, warm drink inside, and your treehouse feeling like a tiny winter cabin in the branches. The reality? A cold floor, sneaky drafts, foggy windows, and that one mysterious drip that always shows up when the temperature drops.
That is exactly why you need to winter-proof your treehouse before winter settles in for good. A treehouse can feel magical in cold weather, but only if it stays dry, sealed, and safe.
Affiliate note: This article includes product recommendations, and I may earn from qualifying purchases.
Why winter hits treehouses harder
A regular backyard shed at least gets some protection from the ground. A treehouse does not. Cold air moves under it, around it, and through every tiny gap you forgot about in summer.
That means your treehouse loses heat fast. The floor gets cold first. Then the wind starts testing your windows, door edges, and roof seams like a burglar checking for unlocked handles.
So, if your plan is “I’ll just toss in a heater and hope for the best,” let me save you some regret. A warmer treehouse starts with the shell, not the appliance.
Start with a brutally honest inspection
Before you buy a single roll of insulation, walk through the space like winter is already trying to break in.
Look for:
- soft wood around windows, roof edges, or the floor
- cracked caulk or old sealant
- loose screws, bolts, brackets, or railings
- water stains on the ceiling or wall panels
- gaps around doors, windows, or access hatches
- drafty corners where light peeks through
If you find rot, fix that first. Insulating over a moisture problem is like putting a nice coat over a soaked shirt. You may feel better for a minute, but the problem is still there.
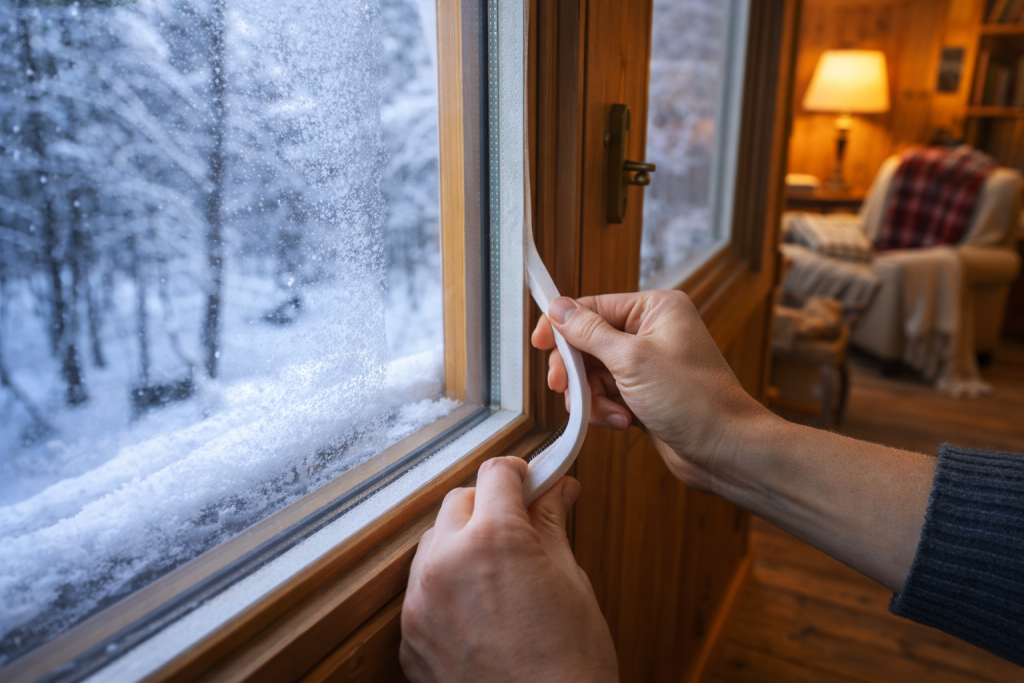
Stop drafts first because wind steals comfort fast
Insulation matters, but air leaks matter just as much. In fact, ENERGY STAR says EPA estimates homeowners can save an average of 15% on heating and cooling costs by air sealing and adding insulation.
That is the simplest way to think about it: insulation is your sweater, but air sealing is your windbreaker. If the wind gets through, the sweater stops feeling impressive pretty quickly.
Start with the obvious trouble spots:
- window frames
- door jambs
- corners where walls meet the roof
- floor seams
- electrical penetrations
- hatch openings
Use weatherstripping, foam tape, or sealant where appropriate. Small gaps create big discomfort.
Insulate the floor because that is where winter sneaks in first
Most people focus on the walls first. I get it. Walls feel important. But in a treehouse, the floor is often the real drama queen.
Because the underside is exposed, the floor can bleed heat all day and feel icy at night. If you can access the underside, add rigid foam or other suitable insulation between joists and protect it properly from moisture and pests. If you cannot access underneath, add insulation above the floor and finish with durable subflooring or rugs.
Even simple upgrades help:
- insulated underlayment
- cork or foam underlayment below finish flooring
- thick rugs or interlocking floor tiles
- draft-blocking at floor-to-wall joints
A warm floor changes the whole mood of the room. Suddenly the space feels intentional instead of improvised.
Treat walls and roof like one weather shell
Walls and roof should work together, not argue with each other.
If you insulate the walls but ignore the roof, heat still escapes upward. If you seal the roof but leave the wall joints leaky, moisture and cold air still get in. Think of the treehouse as one envelope that needs continuity.
Focus on:
- roof insulation where possible
- wall cavity insulation sized correctly for the framing
- sealed joints between roof and walls
- interior finishes that do not leave hidden openings
This is also where people get tempted to overpack insulation into every cavity. Don’t. Crushed insulation performs worse. Fit it neatly, not forcefully.
Don’t trap moisture while chasing warmth
This is the part people skip because it is not glamorous. It is also the part that keeps your treehouse from turning musty by February.
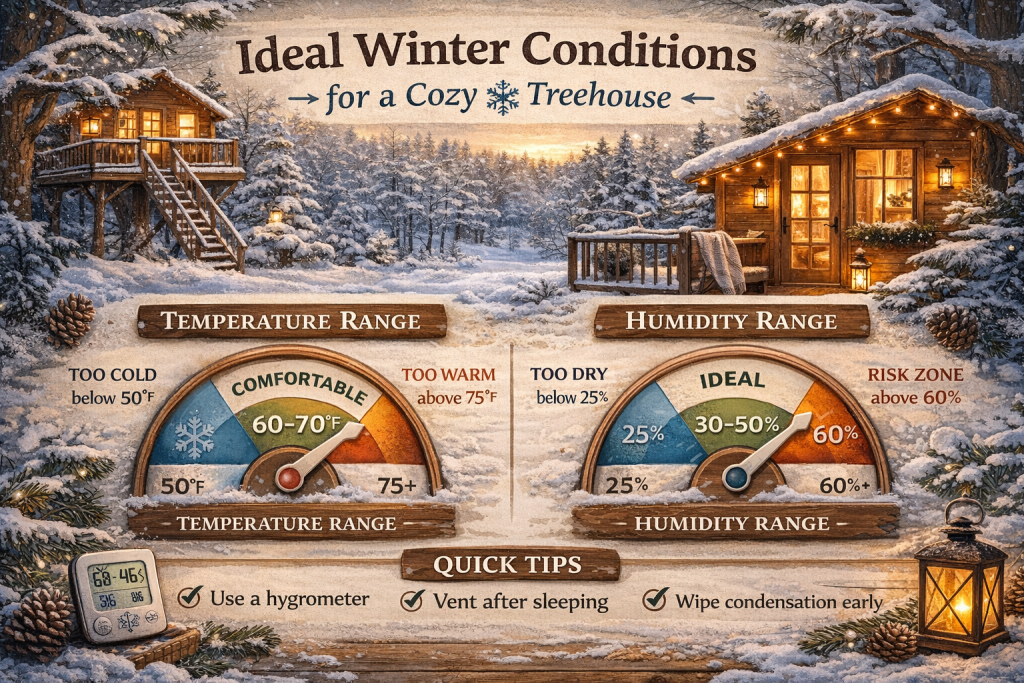
Building Science notes that cold-weather condensation problems are often caused more by air leakage than by simple vapor diffusion, which means warm interior air sneaks into cold assemblies and drops moisture where you do not want it. The EPA also advises keeping indoor humidity below 60%, ideally between 30% and 50%, and acting quickly when condensation appears.
So yes, seal the space well. But also give moisture a way out.
Good habits include:
- venting after cooking or sleeping inside
- wiping window condensation quickly
- avoiding wet gear piled in corners
- using a humidity monitor
- letting the space air out on dry days
Warm and damp is cozy for people. It is also cozy for mold. Keep that in mind.
Give windows a winter job
Windows are not just for light in winter. They are part of your thermal plan.
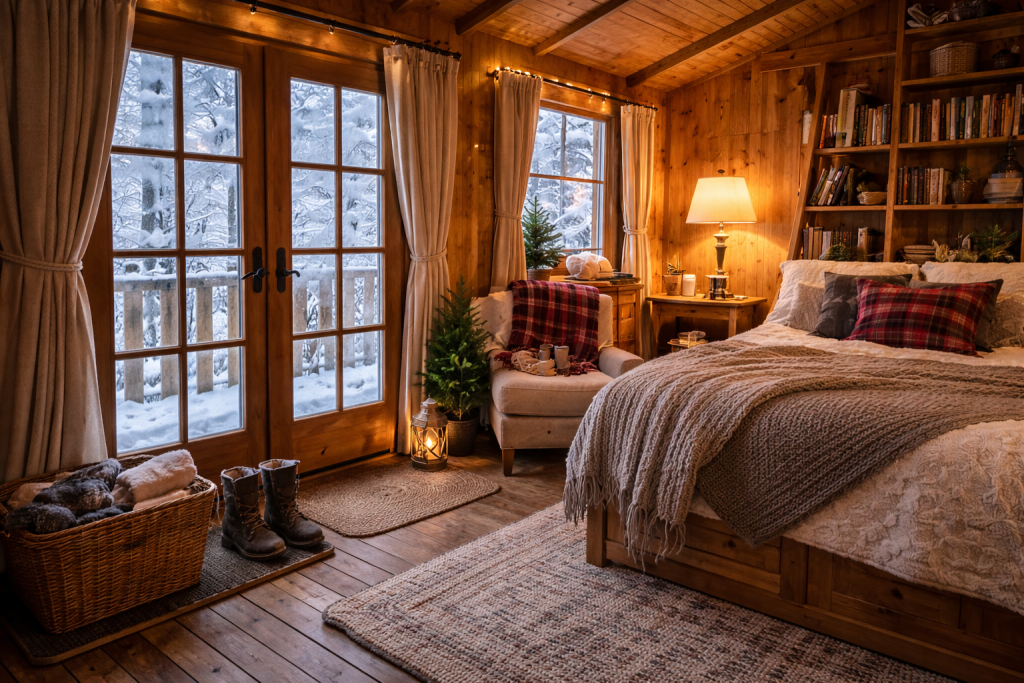
If your treehouse has single-pane windows, adding a seasonal insulation film can make a surprisingly noticeable difference. Heavy curtains also help, especially at night. During sunny days, open them up and let passive solar warmth do a little free work for you.
A good window setup usually looks like this:
- seal the frame
- add insulation film if needed
- use insulated curtains
- keep sills dry
That combo is simple, affordable, and very effective in small spaces.
Upgrade doors, hatches, and entry points
If your door rattles in the wind, your treehouse is basically wearing an unzipped jacket.
Check the sweep at the bottom of the door. Add adhesive foam weatherstripping where the frame leaks. Tighten hardware so the door latches cleanly. If you have a hatch or trapdoor, treat it like a mini exterior door, not an afterthought.
This is one of those boring fixes that feels deeply satisfying the first cold night you do not feel air blowing at your ankles.
Check roof edges, flashing, and runoff
Water always wins when you ignore it long enough.
Inspect your roof covering, flashing, gutters, and drip edges before winter. Snow, ice, and wind-driven rain do not need a giant opening. A weak seam is enough.
Pay special attention to:
- roof penetrations
- skylights
- window tops
- flashing around trim
- gutter clogs
- runoff splashing onto siding or stairs
If water gets in and temperatures swing, you can end up with swollen wood, mold, peeling finishes, or slippery exterior surfaces. None of that feels charming.
Protect stairs, railings, and exterior wood
Winter-proofing is not only about comfort. It is also about access and safety.
Your stairs, ladder, landing, and railings need winter attention too. Tighten fasteners. Replace cracked boards. Apply an exterior finish or water-repellent product suited to the material. Add traction strips where needed.
And please do not ignore drainage. A beautiful treehouse loses a lot of magic when the steps turn into a skating rink.
Heat the space safely and modestly
A small space warms quickly, which is great. It also overheats quickly, which is less great.
For most treehouses, safer winter comfort comes from good sealing, sensible insulation, rugs, warm bedding, and modest electric heat used carefully. Avoid treating a powerful space heater like a cure-all. If you use one, follow manufacturer clearances, keep it away from fabrics, and never leave it unattended.
In other words, do not build a cozy nook and then bully it with the thermal energy of a small sun.
Create a tiny emergency setup
Winter storms are not impressed by your aesthetic.
Keep a compact kit in the treehouse with:
- rechargeable lantern
- phone charging option
- basic first-aid kit
- extra blanket
- gloves and knit cap
- moisture-absorbing cloths or towels
- backup batteries if needed
This is especially smart if kids use the space, guests sleep there, or your treehouse sits far from the house.
5 Amazon products that actually help
Here are five practical picks that make sense for a winter-ready treehouse:
Duck MAX Strength Window Insulation Kit
Short description: A heavy-duty indoor shrink film kit for drafty windows.
Features: Fits up to 10 windows, heavy-duty shrink film, tape included, cut-to-size installation.
Use cases: Best for treehouses with older windows or obvious winter drafts.
Frost King R734H Sponge Rubber Foam Tape
Short description: A simple self-stick foam tape for sealing gaps.
Features: 3/4-inch wide, 7/16-inch tall, 10 feet long, minimal compression, works as weatherstrip or gasket.
Use cases: Great for door frames, hatch edges, and small trim gaps.
Typar Butyl Flashing Tape – 4″ W x 75′ L
Short description: A more serious weatherproofing upgrade for vulnerable seams.
Features: Butyl flashing, split backing, compatible with many caulks and sealants, suitable for installation down to 30°F.
Use cases: Best for roof-edge details, window surrounds, and places where water intrusion worries you.
Jackery Portable Power Station Explorer 300
Short description: A compact backup power source for lighting and small essentials.
Features: 293Wh battery, two pure sine wave AC outlets, 300W output, about 7.1 pounds.
Use cases: Ideal if your treehouse has no permanent power or you want a backup during outages.
GoveeLife Outdoor Indoor Thermometer Hygrometer IP65 Waterproof
Short description: A smart way to monitor cold, damp conditions before they become a mold problem.
Features: Waterproof design, humidity and temperature tracking, app alerts, compact build.
Use cases: Perfect for anyone trying to prevent condensation in a small enclosed treehouse.
What the research and expert guidance say
Here’s the real takeaway: winter comfort is not just about piling in more insulation. It comes from getting three things to work together—air sealing,insulation, and moisture control.
According to the U.S. Department of Energy, uncontrolled air leaks can create drafts, cold spots, and moisture issues, which is why sealing gaps matters just as much as adding insulation. On top of that, ENERGY STAR notes that air sealing and insulation together can reduce average heating and cooling costs by about 15%.
Just as important, Building Science explains that cold-weather condensation inside walls and roofs is often driven by air leakage, not simply vapor diffusion. Meanwhile, the EPA’s moisture and mold guidance recommends keeping indoor humidity below 60%, with an ideal range of 30% to 50%, to help lower the risk of condensation, mold, and damp indoor air.
So the big lesson is simple: if you want to winter-proof your treehouse well, do not rely on one fix alone. A warmer, drier, healthier space comes from balancing airtightness, proper insulation, and enough ventilation to let trapped moisture escape.
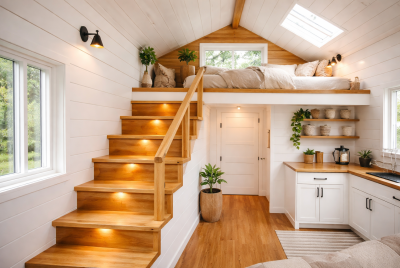
A small-space trick worth borrowing
If you like clever ways to make compact spaces more livable, this guide to tiny house loft design ideas is worth a look. Many of the same small-space comfort tricks work beautifully in a treehouse too.
Mistakes that make a treehouse colder or riskier
A few mistakes show up again and again:
- insulating before fixing leaks or rot
- sealing everything without thinking about moisture
- ignoring the floor
- relying only on a heater
- forgetting stairs, railings, and exterior safety
- storing wet boots, coats, or gear inside for days
- assuming a summer treehouse is automatically winter-ready
None of these are rare. They are just expensive ways to learn the same lesson twice.
FAQs About Winter-proofing a Treehouse
How do I winter-proof a treehouse on a budget?
Start with the cheap wins first: seal air gaps, add foam weatherstripping, install window film, use rugs, and hang thermal curtains. Those fixes usually give the fastest comfort boost for the least money.
What is the best insulation for a treehouse floor?
It depends on access, but rigid foam or properly fitted insulation between joists usually works well. If you cannot reach the underside, focus on insulating above the subfloor and adding warm finish layers.
How do I stop condensation in a treehouse in winter?
Reduce air leaks, monitor humidity, vent the space when needed, and wipe moisture quickly. A humidity monitor helps you catch the problem before damp wood and mold do.
Can I use a space heater in a treehouse safely?
You can, but only carefully. Use a heater with tip-over and overheat protection, keep clearances around it, and never leave it running unattended. Good sealing and insulation should do most of the heavy lifting first.
Should I leave my treehouse sealed all winter?
No. Keep it weather-tight, but not stale. You still need occasional ventilation, especially after people sleep inside, cook, or bring in damp clothing and gear.
Conclusion
To winter-proof your treehouse, focus on the basics in the right order: inspect, seal, insulate, manage moisture, and then add a few comfort upgrades. That is how you get a space that feels snug instead of soggy, warm instead of drafty, and charming instead of chaotic.
Do the small fixes now, and your treehouse can turn into the kind of winter hideaway people actually want to use, not just admire from the yard.