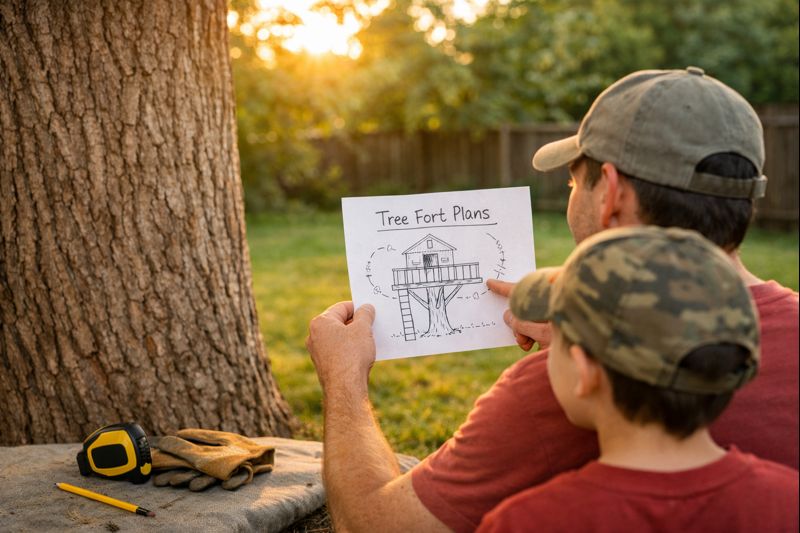
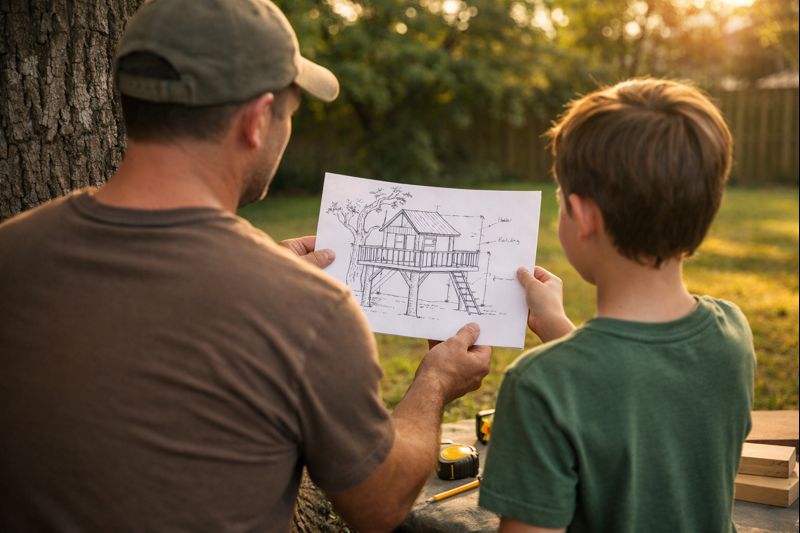
Tree Fort Plans for Kids: Safe, Simple Designs
We may earn a commission for purchases made using our links. Please see our disclosure to learn more.
You’ve got the idea in your head already: kids laughing up in the branches, a little “no adults allowed” sign, and that magical feeling like your backyard just became a storybook.
But then reality shows up with a tape measure and anxiety: What if it’s not safe? What if I mess up the tree? What if this turns into a wobbly platform of regret?
Good news: tree fort plans don’t have to be complicated to be sturdy, fun, and safe. You just need the right style of plan, a smart build order, and a few “don’t skip this” safety moves.
Affiliate note: This article includes an Amazon affiliate section—if you buy through those links, you may earn a small commission at no extra cost to you.
Choose your “main character energy” first
Before you buy lumber or sketch anything, decide what this fort is for.
Is it:
- A reading nook with a roof and a window?
- A play base for 2–3 kids at a time?
- A hangout deck for older kids who want privacy but still want to hear you yell “SNACK TIME”?
This matters because the best tree fort plans are the ones that match your family’s vibe. A “simple platform + railing” build is perfect for younger kids. Meanwhile, a “roof + walls + ladder” build feels magical for imaginative play.
If you’re craving that cozy, cabin-ish look, this rustic treehouse design inspiration can help you choose the style before you commit to a blueprint.
Tree check: pick a solid tree (or go “tree-adjacent”)
A tree fort is only as good as what holds it up.
Look for:
- A healthy, mature tree (no hollow trunk sounds, no big dead limbs)
- Solid roots and stable ground (not a swampy corner)
- A trunk that’s thick enough to feel dependable
No good tree? You’re not disqualified. Plenty of “tree fort plans” are really tree-adjacent forts—think posts in the ground with the platform near a tree for the vibe, not the weight-bearing.
That’s honestly a great option if you want predictable strength and less tree stress.
Tree fort plan styles that are beginner-friendly
Let’s keep this realistic: you want “proud of myself” energy, not “why did I do this” energy.
Here are beginner-friendly styles:
Simple Platform Fort
A deck in the air with railings. Add a ladder. Done.
- Best for: first build, younger kids, small backyards
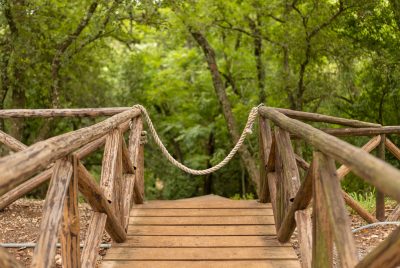
Two-Tree Bridge Platform
Two smaller platforms with a short bridge between.
- Best for: bigger yards, kids who love “mission” play
Post-Supported Fort with Tree Accent
Posts do the heavy lifting; the tree adds charm.
- Best for: questionable trees, long-lasting builds
Ground-Plus Fort (Half Raised)
A small raised platform with a shaded play area underneath.
- Best for: toddlers + siblings, more use year-round
Sizing it: platform shape, height, and kid-friendly flow
Most build mistakes happen here: you size it for your imagination, not your actual space.
Keep the first fort:
- Small enough to supervise easily
- Big enough for the number of kids you expect
- Simple enough to finish in a weekend or two
Also, think about flow:
- Where do kids climb up?
- Where do they stand to look out?
- Where might they jump (because they will)?
Design your plan so the “jump zone” isn’t a mystery.
Materials list that keeps things sturdy (and low drama)
You don’t need exotic lumber. You need dependable basics.
Common materials for strong tree fort plans:
- Pressure-treated lumber for outdoor structure (where appropriate)
- Weather-resistant deck boards for the platform
- Exterior-rated screws and hardware
- Rail boards that don’t splinter easily
- Outdoor stain or sealant
Quick tip: If your goal is “less maintenance,” choose materials that handle weather well. If your goal is “looks amazing,” choose materials that stain beautifully—but plan to reseal later.
Tools and prep that save your weekend
You can build with basic tools, but the secret weapon is prep.
Do this first:
- Mark your cuts before you touch a saw
- Pre-sort lumber by length
- Set a “hardware bowl” so nothing disappears into the grass
- Charge every battery you own
And if you’re short on tools, borrow what you can. A borrowed level for one weekend is cheaper than rebuilding a crooked platform forever.
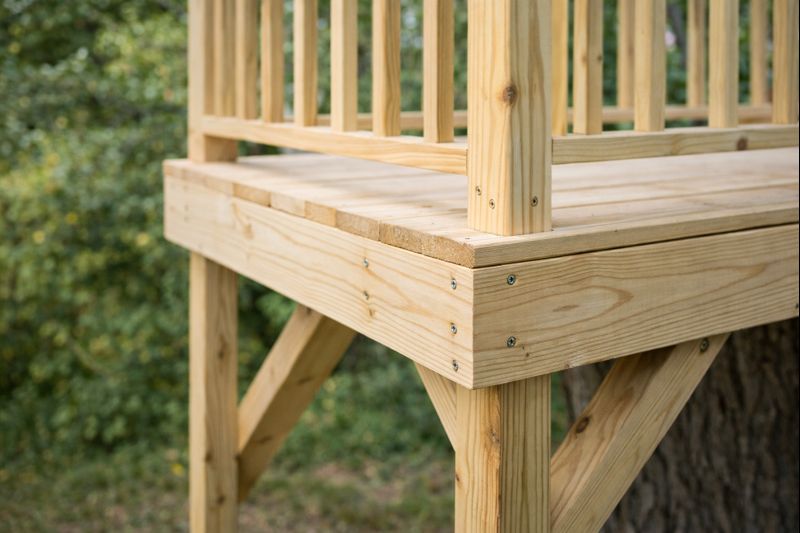
The platform: build it level, build it once
The platform is the “floor of the whole story.” If it’s off, everything feels off.
Basic platform tips:
- Build the frame square
- Check level as you go (not at the end)
- Use bracing early, not as a panic fix later
- Leave small gaps between deck boards for drainage
If you’re choosing between “looks perfect” and “feels solid,” always pick solid. Kids don’t care if it’s Pinterest-perfect. They care if it bounces like a trampoline.
Bracing, posts, and the “no-wobble” test
Wobble is the enemy of confidence.
The easiest way to reduce wobble:
- Add diagonal braces
- Reinforce corners
- Use strong connectors where boards meet
- Don’t rely on a single fastener point when you can spread the load
Here’s the test: stand on the platform and gently shift your weight side to side. If it feels like a boat… add bracing. (And yes, you will feel a little silly doing this. That’s part of the process.)
Safe access: ladders, stairs, and climbing routes
Kids want to climb. You want them to climb without chaos.
Options:
- Angled ladder: easiest build, feels safer than vertical
- Stair-style steps: best for younger kids and heavy traffic
- Climbing wall holds: fun, but use it as a secondary access point
Little detail that matters
Add a handhold near the entry point. That’s where slips happen—right at the “almost there” moment.
Railings, walls, and openings kids won’t regret later
Railings aren’t just “safety.” They change how the fort feels.
A good railing:
- Lets kids see out
- Keeps bodies in
- Doesn’t invite risky balancing
If you’re adding walls, keep airflow in mind. Nobody wants to play in a hot wooden oven. Small windows also make it feel like a real fort—not just a platform with anxiety.
Roofs and shade: keep it dry, keep it cool
A roof is optional… but it’s the difference between “cute weekend fort” and “they use this all summer.”
Simple roof ideas:
- Slanted roof (water runs off easily)
- Pergola-style slats for partial shade
- Lightweight corrugated panels for quick coverage
If you do a roof, plan for rain runoff so it doesn’t drip right onto the ladder like a backyard water torture device.
Add-ons kids love: swings, slides, and secret nooks
This is the fun part—just don’t add everything at once.
Kid-approved upgrades:
- A swing beam attached to a strong support point
- A slide off one side (with a clear landing zone)
- A trapdoor hatch (they’ll talk about it for months)
- A mailbox for secret notes
- A rope bucket to lift snacks (iconic behavior)
Start with one “wow feature,” then add more after you’ve lived with the fort for a few weeks.
Finishing touches that make it feel like theirs
This is where your kids feel ownership.
Easy finishing wins:
- Let them name the fort (it will be dramatic)
- Add a small chalkboard sign
- Use outdoor-safe paint accents
- Hang solar fairy lights (no cords = less stress)
And please—sand the spots where hands go the most: ladder rails, railing tops, and door edges.
Product picks: Gear that pairs well with tree fort plans
1) Deck Plus 3 Inch Epoxy Coated Exterior Wood and Fence Screws (#10 x 3)
A go-to option for outdoor builds where you want strong holding power and weather resistance.
Features:
- Exterior-rated coating for rust resistance
- Star/Torx drive helps prevent stripping
- Designed for decking, fencing, and outdoor lumber
Best for: platform boards, railings, framing connections
2) DEWALT Drill Bit Set (DWA1184), 14-Piece
A versatile bit set for drilling clean pilot holes and reducing wood splitting—especially helpful when you’re working near edges.
Features:
- Split-point tips help start holes cleanly
- Multi-material use (wood + metal + plastic)
- Handy for pre-drilling and hardware installs
Best for: pilot holes, clean fastener installs, reducing cracked boards
3) 20 pcs 2×4 Joist Hanger (LU24 style), 20 Gauge
These add strength at critical joints—especially where your platform framing meets supports.
Features:
- Helps reinforce load-bearing joints
- Galvanized finish for outdoor use
- Handy when you want extra peace of mind
Best for: platform framing support points and structural reinforcement
4) PLAYVIBE 40″ Saucer Tree Swing
An easy “wow upgrade” that turns a basic fort into the place every kid suddenly wants to visit.
Features:
- Big seat = multiple kids can use it (with supervision)
- Great add-on for a nearby branch or swing beam
- Strong backyard-play vibe
Best for: turning your fort area into a full play zone
5) Saysurey 48 Pairs Safety Glasses (ANSI Z87.1)
Not glamorous, but very “future you” will be grateful. If you’re cutting, drilling, or sanding, eye protection is non-negotiable.
Features:
- ANSI-rated impact protection
- Handy if multiple helpers/kids are nearby
- Great for sanding + drilling days
Best for: safer DIY builds, group projects, and cleanup
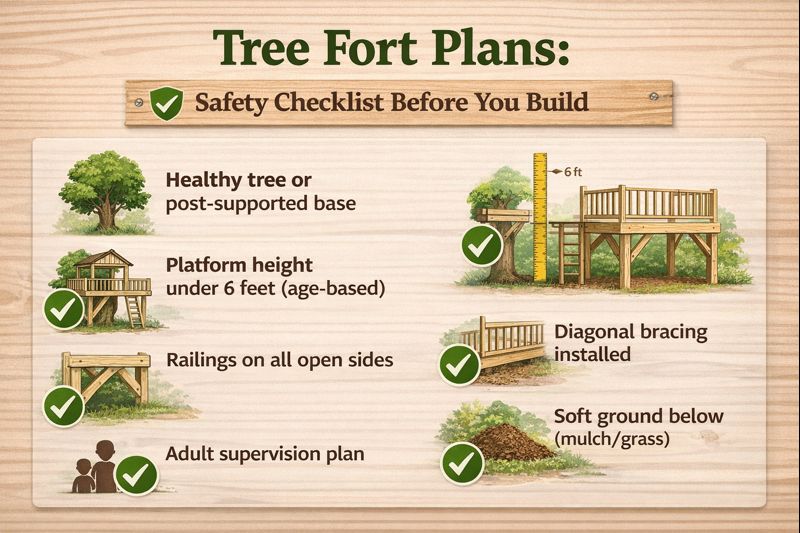
Research-backed safety notes for tree fort plans (what the data nudges us to do)
If you’re thinking, “Okay but… how safe is this really?” you’re asking the right question.
Two useful takeaways from broader play-structure safety research:
- The U.S. Consumer Product Safety Commission has reported large numbers of emergency-department treated injuries associated with playground equipment, with falls being a major contributor in many datasets. That doesn’t mean “don’t build.” It means: build lower when you can, add good railings, and give kids a safe landing area. See the playground injury estimates (CPSC report) for context.
- A peer-reviewed study looking at playground equipment-related extremity fractures found that fractures make up a meaningful slice of playground injury visits—especially in school-age kids—again pointing back to height, falls, and landing zones as the big levers you can control. Here’s the study on playground extremity fractures.
So what does that mean for your tree fort plans?
Keep it simple:
- Avoid “sky-high” builds for the first fort
- Use sturdy railings and no sketchy openings
- Make the ground below forgiving (no rocks or hard edges)
- Supervise based on age and risk tolerance (because kids are brave in ways adults can’t predict)
FAQs about tree fort plans
How do I make tree fort plans safer for younger kids?
Start with a lower platform, add sturdy railings, and choose a wide, stable ladder or stairs. Also, keep the play space uncluttered so nobody trips while pretending to be a pirate.
Can I build tree fort plans without drilling into the tree?
Yes. You can go post-supported or build a “tree-adjacent” fort where the tree is more aesthetic than structural. It’s a great choice if you want a more predictable build.
What’s the easiest tree fort plan for a first-timer?
A small square platform with railings and an angled ladder. It’s simple, forgiving, and you can upgrade it later with walls, shade, or a swing.
What wood is best for outdoor tree fort builds?
Many DIY builders use exterior-suitable lumber and protect it with a good outdoor sealant or stain. The “best” choice depends on your climate and budget—your goal is durability and low splinter risk.
How long do tree fort plans usually take to build?
A basic platform fort can happen over a weekend if you prep well. Add walls or a roof and it usually becomes a two-weekend project (especially if you want it to feel polished).
Bottom line: You don’t need a perfect build to create a magical one. Pick a simple plan, build it sturdy, and let your kids turn it into a world. And when you’re done? Take a photo—because one day, you’ll miss the tiny muddy shoes on your ladder.