DIY Treehouse: A Practical Guide to Planning and Building One Well

We may earn a commission for purchases made using our links. Please see our disclosure to learn more.
A DIY treehouse can be a backyard hideaway, a family project, or a quiet platform among the leaves. The challenge is turning that idea into a structure that respects the tree, suits your skills, and remains practical to inspect. Before buying lumber, you need to consider permits, tree health, loads, access, weather, and who will use the space.
This guide puts those decisions in a sensible, practical order. You will learn how to choose a site, select a design, plan the platform, reduce common hazards, compare useful tools, and recognize when an arborist, engineer, or experienced builder should take over.
Start With the Purpose, Not the Lumber
Decide who will use the treehouse and what they will do there. A low reading deck for children needs a different layout from an adult retreat. Note the users, occupancy, furniture, access, and need for walls or weather protection.
Then set limits. For a first DIY treehouse, a compact rectangular platform with partial shelter is easier to frame, supervise, maintain, and finish than a miniature cabin.
Check Local Rules, Utilities, and Property Limits
Contact your local building department before digging or attaching hardware. Rules may depend on platform height, floor area, setbacks, electrical work, covenants, and how the structure is classified.
Locate buried utilities before installing posts, and measure from verified property boundaries rather than fences. Discuss shared trees, overlooking, or contractor access with neighbors early. That conversation is easier than moving a completed DIY treehouse after a complaint or boundary dispute.
Choose a Healthy Tree—or Build Around One
Look for a mature tree with a healthy canopy and no obvious cavities, major dead limbs, root damage, fungal growth, or severe lean. Species, soil, storms, and local pests also affect suitability, so appearance cannot confirm structural condition.
Ask a qualified arborist to evaluate the tree and work zone. If no suitable tree exists, use posts around the trunk. A freestanding DIY treehouse preserves the feeling while simplifying movement and load questions.
Pick a DIY Treehouse Design That Matches Your Skills
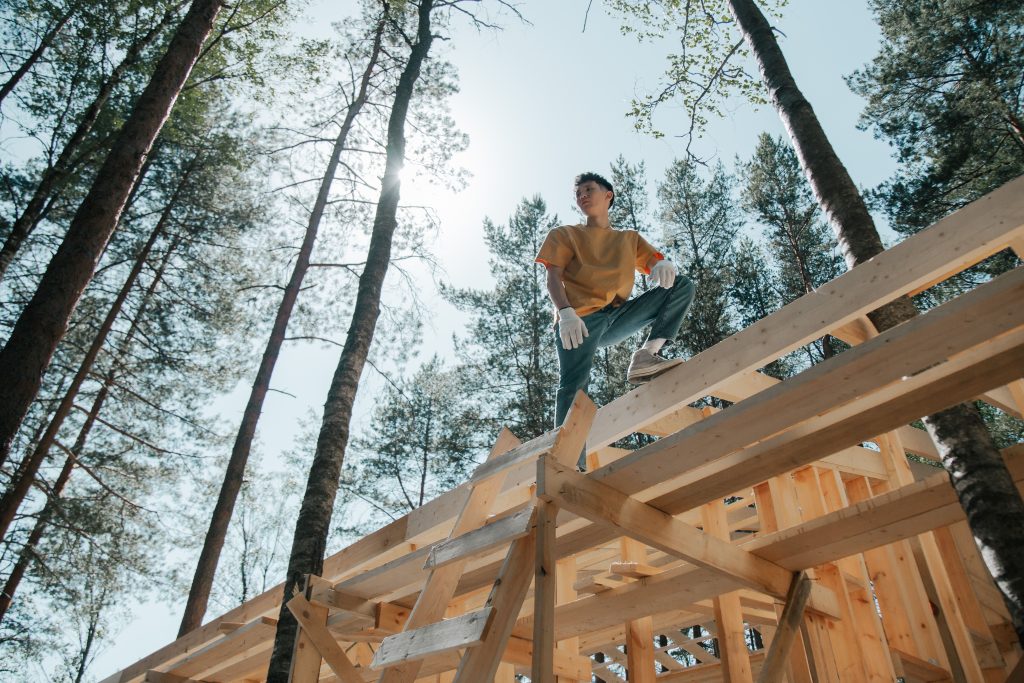
Choose a single-tree platform, multi-tree span, tree-and-post hybrid, or freestanding structure. Designs with several living supports must accommodate independent movement, increasing complexity.
Before fixing the footprint, compare these treehouse floor plans for long-lasting durability to see how support layouts change the framing problem. Keep the shape simple and draw supports, beams, joists, access, guards, walls, and roof separately so conflicts appear before construction.
Plan Loads, Movement, and Attachment Points
A DIY treehouse carries its own weight plus people, furniture, wind, rain, and sometimes snow. Trees also sway and expand, so ordinary deck details should not be copied blindly onto a trunk.
Use attachment methods designed for the structural plan. Avoid clusters of small fasteners or tight chains around living tissue. Seek engineering review for unusual spans, multiple trees, high platforms, heavy roofs, uncertain soil, or any design you cannot confidently calculate.
Gather Materials and Stage the Work
Create a cut list from the final drawing, separating structural lumber, decking, wall framing, roofing, connectors, and finishes. Choose exterior-rated materials for your climate, and match fasteners and connectors to treated lumber.
Whenever practical, assemble wall, railing, and roof sections at ground level. Label parts, protect roots from traffic and material piles, and keep the work area clear. Careful staging reduces ladder time and awkward lifting.

Build the DIY Treehouse Platform Carefully
A DIY treehouse platform controls everything above it. Establish a level reference, install the primary supports according to the reviewed plan, and verify measurements before tightening. Place joists consistently, add specified blocking, and compare diagonals to confirm the frame is square.
Recheck level, plumb, connector placement, and trunk clearances. Preserve any gap designed for tree movement. Small platform errors become crooked walls, uneven decking, and difficult roof joints.
Add the Floor, Walls, and Roof
Install decking with suitable drainage gaps, avoiding abrupt level changes that create trip points. Frame walls on the ground when possible, brace them during installation, and keep openings within the structural plan.
Use enough roof pitch and overhang to shed water, with flashing at vulnerable joints. Never seal siding or roofing tightly around a growing trunk. Leave a maintainable opening and direct water away from bark and framing.
Design Access, Railings, and the Fall Zone
Choose access for the youngest intended user, not the most agile builder. Stairs with secure handholds suit more people than a vertical ladder. If using a ladder, prevent movement and provide a stable platform transition.
Guard every open edge, including trunk gaps. Avoid openings that could trap a head, foot, or clothing, and remove protruding fasteners. Clear rocks, edging, tools, and other hard obstacles from below the DIY treehouse.
Weatherproof Without Trapping Moisture
A DIY treehouse faces moisture at end grain, horizontal joints, debris-filled gaps, and shaded corners. Encourage drainage, ventilate enclosed spaces, and keep leaves from accumulating between framing and trunk.
Apply exterior finishes according to preparation and recoat instructions. Inspect flashing, roof edges, fastener heads, and cut ends after severe weather. Preserve airflow and growth clearance; weatherproofing should never encase bark or hold water against the tree.
Control the Budget, Schedule, and Scope
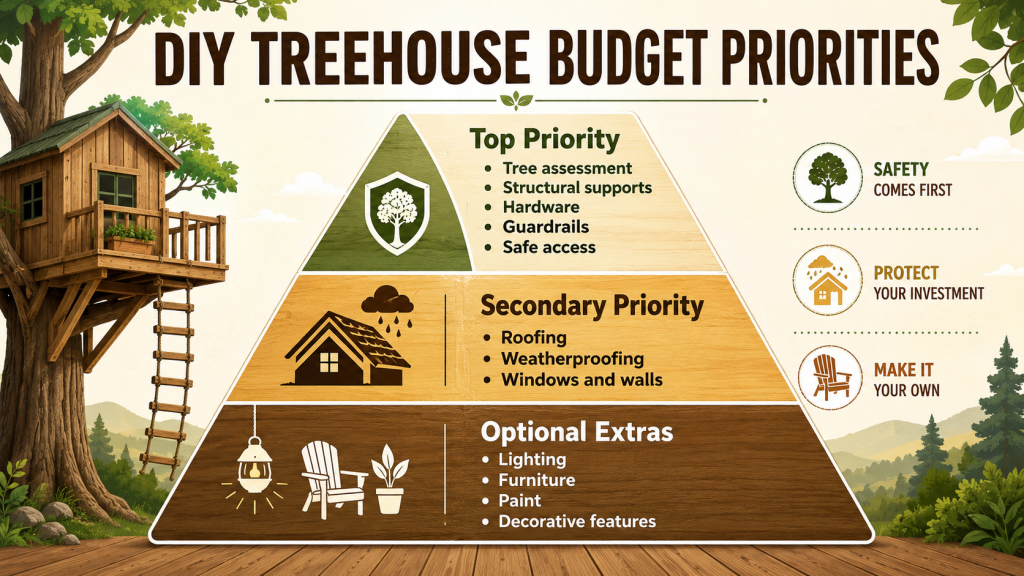
Put structural review, suitable connectors, guards, access, and weather protection ahead of decorative windows, lighting, furniture, or trim. Include delivery, permits, tool rental, disposal, and professional consultations in the budget.
Organize work into assessment, approvals, design, supports, platform, guards, enclosure, and finishes. Leave time for checks. If costs rise, reduce floor area or postpone nonstructural features rather than compromising hardware or rushing elevated work.
Recommended Products for a DIY Treehouse
These choices cover planning, layout, clamping, drilling, measuring, and access rather than repeating one tool category.
| Product | Best fit | Notable feature |
| Black & Decker treehouse guide | First-time planners | Illustrated projects and plans |
| Bosch GLM20 laser measure | Site measurement | Real-time distance readings |
| Swanson 7-inch Speed Square | Budget layout work | Multiple layout functions |
| IRWIN QUICK-GRIP clamp set | Ground-level assembly | One-handed mini clamps |
| DEWALT DCD771C2 drill/driver set | General fastening | Two-speed cordless drill |
| Little Giant Velocity M17 | Multi-height access | Multi-position configuration |
Black & Decker The Complete Photo Guide to Treehouses 3rd Edition: Design and Build Your Dream Treehouse
Best for: First-time planners
This illustrated guide combines design ideas, developed plans, and construction photographs. It helps beginners visualize sequencing and details before ordering materials. However, a book cannot account for your tree, site, climate, or local code, so use it as planning support rather than project-specific engineering.
BOSCH GLM20 Blaze 65ft Laser Distance Measure with Real Time Measuring
Best for: Measuring awkward sites
The GLM20 provides continuous, real-time distance readings across a range suited to most backyards. It helps check clearances, approximate spans, and building distances without wrestling with a long tape. Still, it does not replace physical verification at attachment and cut points, particularly on curved bark or uneven surfaces.
SWANSON Tool Co S0101 7 Inch Speed Square, Blue
Best for: Budget-conscious layout work
This compact aluminum square works as a try square, miter square, saw guide, line scriber, and basic protractor. It helps mark joists, decking, braces, and wall components without crowding a tool belt. Its seven-inch size is convenient, although larger layouts may require a longer square or straightedge.
IRWIN QUICK-GRIP Bar Clamp, One-Handed, Mini, 6-Inch (2), 12-Inch (2), 4-Pack (1964748) Blue, Yellow
Best for: Builders assembling parts on the ground
The set includes two six-inch and two twelve-inch one-handed clamps with non-marring pads. They can hold trim, templates, railing parts, or small framing pieces during alignment and fastening. Their compact capacity suits light assembly; larger beams and demanding structural setups require clamps selected for the actual size and force.
DEWALT 20V Max Cordless Drill Driver Set, 2 Speed, High Performance Motor, Includes 2 XR 1.3Ah Li-Ion Batteries, Charger and Contractor Bag (DCD771C2)
Best for: General drilling and fastening
This small drill/driver comes with two batteries, a charger, and a carrying bag. It has two speed ranges. It suits routine pilot holes and fastening during platform, decking, and enclosure work. However, correct bits, clutch settings, and fastener specifications remain essential, while heavy structural connections may need different equipment.
Little Giant Ladders, Velocity, M17, 17 Ft, Multi-Position Ladder, Aluminum, Type 1A, 300 lbs Weight Rating, (15417-001)
Best for: Projects needing several ladder configurations
The Velocity M17 converts among stepladder, extension, staircase, and ninety-degree configurations, helping with uneven approaches and changing work heights. Its Type IA rating is 300 pounds. It is heavier and more complex than a basic ladder, so users must understand its locks and follow setup instructions each time.
Research-Backed DIY Treehouse Safety and Tree Health
Treehouse-specific controlled research is limited, so decisions combine building knowledge with wider safety and arboriculture guidance. The CPSC’s 2015 Public Playground Safety Handbook identifies falls as the largest single playground hazard pattern and emphasizes surfacing, maintenance, entrapment prevention, and removal of protrusions. Although written for public playgrounds, those categories help review private designs.
The International Society of Arboriculture’s tree-risk guidance warns that construction can damage roots, soil, trunks, and branches. A 2002 Arboriculture & Urban Forestry hardware study documented localized discoloration and decay around bolts but acknowledged its small sample.
For access, OSHA’s ladder requirements reinforce stable footing, secure setup, and balance. They are workplace rules, not residential code, so local requirements and manufacturer instructions still control.
DIY Treehouse FAQs
Can a beginner build a DIY treehouse?
A beginner can build a low, simple, ground-supported or hybrid platform when the plan is clear and experienced help covers structural decisions. Start with a small rectangle, minimal enclosure, straightforward access, and ground-level assembly. Consult an arborist and seek engineering or qualified building advice whenever attachments, loads, spans, height, or soil conditions are uncertain.
How high should a treehouse be?
There is no universal ideal height. Keep the platform only as high as its purpose requires, considering user age, supervision, access, guards, the fall zone, and local rules. Lower platforms simplify construction, inspection, and maintenance while reducing consequences. A better view is not a sound reason to exceed your skills or professional guidance.
Can I build a treehouse without drilling into the tree?
Yes. A freestanding platform can surround a trunk without relying on it, while hybrid designs may place most loads on posts. This avoids structural tree attachments but still requires suitable footings, bracing, setbacks, and clearance for growth and movement. Keep framing from rubbing bark or compacting the root zone.
What wood should I use for a DIY treehouse?
Use structural and exterior-rated lumber appropriate to your climate, exposure, design, and local code. Ground-contact parts may need a different treatment category from above-ground framing. Match connectors to treated-lumber requirements and protect cut ends as directed. A local professional should specify grades and member sizes for the actual loads and spans.
How frequently should a treehouse be inspected?
Inspect it before each season of regular use, after major storms, and whenever the tree or structure changes. Check supports, connectors, guards, access, decking, roof, moisture-prone joints, branches, and trunk clearances. Stop use after finding decay, looseness, cracking, damage, or movement, and obtain qualified advice before repairs.
Final Recommendation: Build the Smallest DIY Treehouse That Works
A successful DIY treehouse begins with restraint. Confirm local requirements, choose a healthy site, keep the platform low and simple, and design for its real users. Spend first on assessment, sound framing, suitable connections, safe access, guards, and drainage; decoration can wait.
The Black & Decker guide can help first-time planners visualize the sequence, while the Swanson Speed Square and a dependable drill/driver cover common layout and fastening. Still, tools cannot replace judgment. Ask an arborist about the tree, request structural review when uncertainty is meaningful, and inspect the structure regularly. Build only what you can plan, execute, and maintain responsibly.