How to Build a Treehouse Platform: A Step-by-Step Guide
We may earn a commission for purchases made using our links. Please see our disclosure to learn more.
A treehouse platform is an invitation to adventure, creativity, and enduring memories—it’s more than just a backyard project. Making the platform correct is crucial, whether you’re making it for your children, a creative workstation, or a tranquil retreat. This article will show you exactly how to construct a treehouse platform that is safe, strong, and suitable for trees.
Let’s dissect the entire procedure in a straightforward manner for novices.
Planning Your Treehouse Platform
Choosing the Right Tree
Your foundation starts with the tree. Look for a healthy, mature hardwood like oak, maple, or fir. It should be at least 12 inches in diameter with no signs of disease, rot, or major dead limbs.
Understanding Weight and Load Distribution
Platforms must hold weight evenly. Think about how many people will be using it, plus furniture or added features. If possible, distribute the load across two trunks or limbs. This not only improves safety but also increases the lifespan of your build.
Sketching the Design
Grab a pencil and sketch your vision. It doesn’t have to be perfect—just accurate enough to estimate materials and space. Most beginners start with a platform around 8×8 feet.
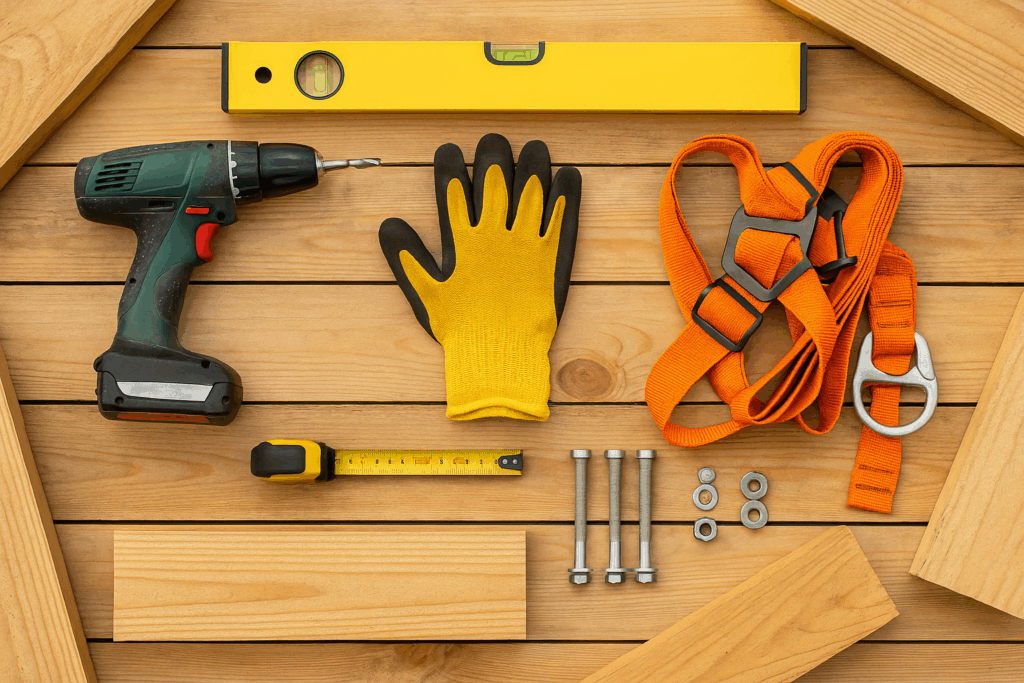
Tools and Materials You’ll Need
Essential Tools for the Job
- Power drill
- Socket wrench
- Level
- Saw (circular or handsaw)
- Safety gear: gloves, goggles, and harness
Best Materials for Treehouse Stability
- Pressure-treated lumber
- Galvanized lag bolts
- Treehouse Attachment Bolts (TABs)
- Decking boards
- Floating brackets
Step-by-Step Instructions to Build a Treehouse Platform
Step 1: Prepare the Tree and Ground Area
Clear the space below and around the tree. Make sure your ladder is stable and secure, and always wear a harness when working above six feet.
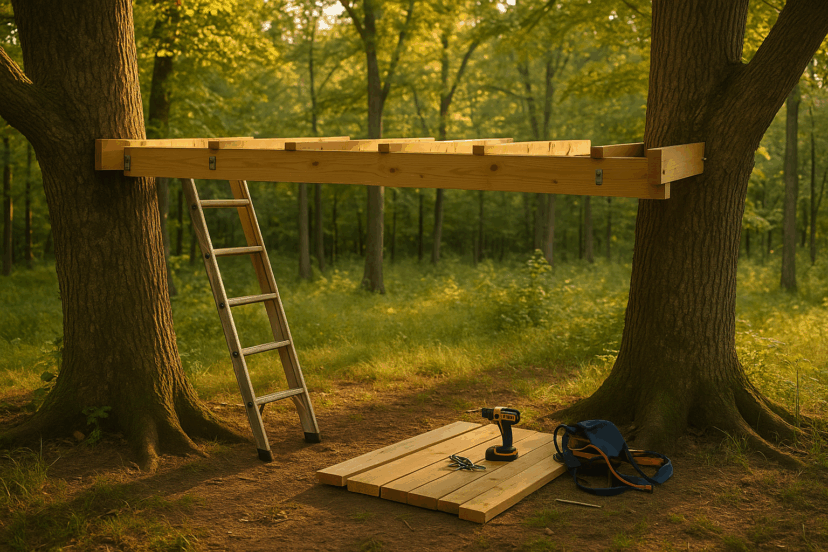
Step 2: Install the Support Beams
Attach two parallel support beams using floating brackets or TABs. These should run level across the tree and be firmly secured. Use a level to check precision.
Step 3: Attach the Joists and Cross Bracing
Install joists perpendicular to the beams, spaced around 16 inches apart. Use hurricane ties for reinforcement, and add diagonal braces underneath to reduce movement.
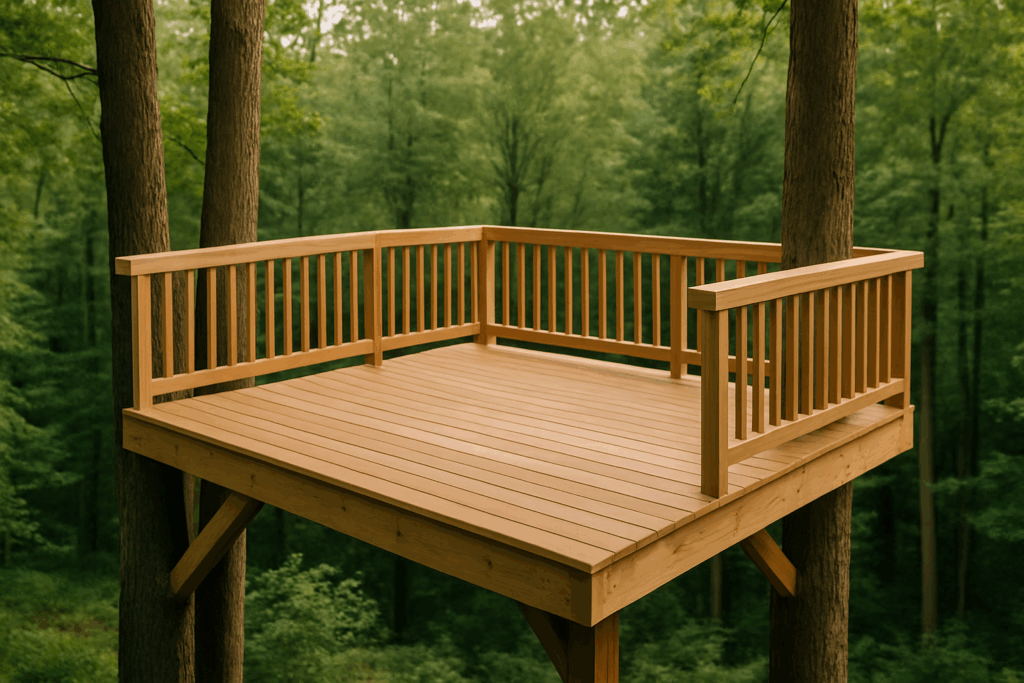
Step 4: Build the Platform Deck
Lay your decking boards, leaving ¼-inch gaps for drainage and natural movement. Ensure the boards are flush, secure, and level.
Step 5: Check for Stability and Safety
Test the structure by gently shifting your weight on it. Listen for creaks or movement. Tighten all bolts and smooth out any rough spots.
Tree-Friendly Construction Tips
Avoiding Damage to the Tree
Never drill through the entire trunk. Minimize the number of penetrations and avoid wrapping anything around the tree, which can restrict growth.
Using Floating Brackets and TABs
Floating brackets allow the tree to sway and grow, reducing stress on your structure. Treehouse Attachment Bolts (TABs) offer deep anchoring with minimal damage, making them ideal for long-term support.
Research-Backed Insights on Treehouse Platform Design
Learnings from Practical Treehouse Modelling
The study Practical Modelling in Treehouse Development highlights key lessons from international workshops. It found that flexible, modular designs—especially those using floating supports—perform better in environments with tree movement or seasonal shifts. This supports the use of floating brackets and TABs in your build.
Essential Treehouse Safety Guidelines
Treehouse Supplies shares vital treehouse safety guidelines and best practices, emphasizing the importance of strong anchor points, fewer penetrations, and proper load distribution. These expert-backed tips align closely with the step-by-step method outlined in this guide.
Recommended Products for Building a Treehouse Platform
Here are tools and materials that can help you build a secure, lasting treehouse platform:
- Treehouse Attachment Bolts (TABs) – Heavy-duty bolts designed specifically for treehouse builds
- Floating Brackets – Allow movement without damaging the tree
- Pressure-Treated Lumber – Rot- and insect-resistant for long-term use
- Full Body Safety Harness – A must-have for working at height
- Power Drill Combo Kit – Includes drill, impact driver, and batteries
- Firecore 9-Inch Level Tool – Ensures perfect horizontal alignment
Final Touches and Maintenance Tips
After your platform is up, consider sanding the surface and sealing it with a weatherproof coating. Check bolts and boards every few months, especially after storms or seasonal changes. Remember, your tree is alive and growing—build with flexibility in mind.
Inspiration for Expanding Your Treehouse Project
Once your platform is complete, the possibilities are endless. Whether you’re dreaming of a reading nook, a playhouse, or even a cozy retreat, the structure you build above it can be just as exciting. Take a look at this two-story tiny house treehouse design for some serious inspiration—it beautifully demonstrates how a simple platform can evolve into a magical, functional space in the trees.
Conclusion
Building a treehouse platform may seem like a big task, but with a clear plan, the right tools, and safe techniques, it’s absolutely doable. It’s a project that pays you back in joy, creativity, and time outdoors.
So grab your gear, pick your tree, and start building. Your future treehouse awaits—one beam at a time.
FAQs
What is the best tree for a treehouse platform?
Hardwoods like oak, maple, and fir are the best choices due to their strength and maturity.
How high should a treehouse platform be?
Aim for 6 to 10 feet above ground. This keeps it fun yet safe.
Can I build a platform without damaging the tree?
Yes. Use TABs and floating brackets to reduce harm while maintaining support.
What is the safest way to attach the platform?
Use two or more Treehouse Attachment Bolts spaced several feet apart for strong load-bearing.
Does constructing a treehouse platform require a permit?
Possibly. Always check local building regulations and zoning laws before you begin.