How To Build A Treehouse Rope Bridge
We may earn a commission for purchases made using our links. Please see our disclosure to learn more.
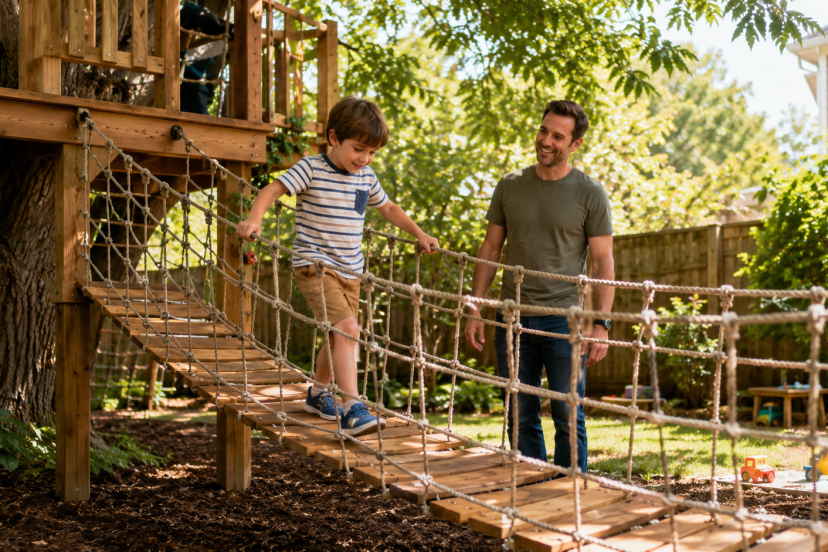
A treehouse already feels magical, but add a Treehouse Rope Bridge, and suddenly the whole backyard has main-character energy. It turns a simple platform into an adventure route, a lookout path, and maybe the place where every kid in the neighborhood wants to hang out.
But let’s be honest: a rope bridge is not the part of a treehouse where you want to “just wing it.” It needs to feel fun, not terrifying. It should sway a little, but not enough to make Grandma clutch the fence. In this guide, you’ll learn how to plan, build, secure, and maintain a backyard rope bridge with safety, style, and long-term use in mind.
Affiliate Disclosure: As an Amazon Associate, I may earn from qualifying purchases at no extra cost to you.
Why A Treehouse Rope Bridge Makes A Backyard Feel Magical
A Treehouse Rope Bridge adds movement, challenge, and imagination. Kids do not just climb into a treehouse anymore. They cross into it.
That tiny shift changes everything.
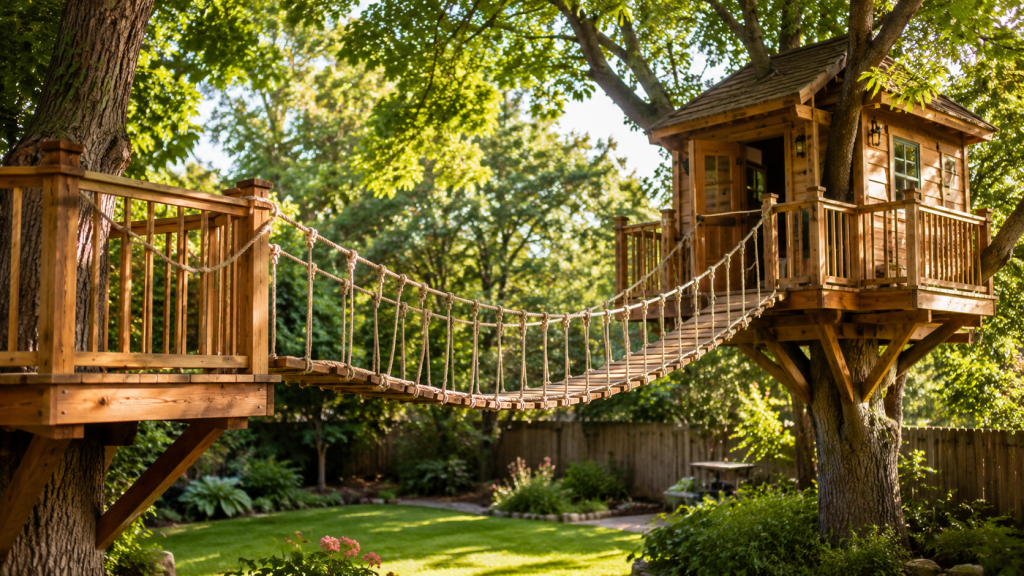
A bridge can connect two tree platforms, link a playhouse to a deck, or create a short adventure path between posts. For children, it feels like crossing a jungle trail, a castle walkway, or a pirate ship plank. For adults, it adds charm and a strong visual feature to the yard.
It also encourages balance, coordination, and confidence. That said, the goal is managed adventure. You want a bridge that feels exciting while still being properly anchored, inspected, and age-appropriate.
Start With A Safety-First Plan
Before you buy rope or cut wood, pause and look at the whole play area. Where will the bridge start? Where will it end? What is underneath it? Can you see it clearly from the house or patio?
The U.S. Consumer Product Safety Commission says about 50,000 children visit emergency rooms each year because of home playground equipment injuries, and about 80% of those injuries happen from falls. That does not mean you should avoid backyard play. It means the design should respect gravity, because gravity has no chill.
Ask These Questions First
Before building, think through:
- Who will use the bridge?
- How high will it be?
- What is the longest span?
- Will adults need to cross it?
- Is the ground below shock-absorbing?
- Can the bridge be supervised easily?
If the bridge is high, long, or connected to living trees, it is smart to consult a builder, arborist, or structural professional.
Choose The Best Rope Bridge Style
Not every backyard suspension bridge needs to look like something from an adventure movie. Some families want a gentle bridge for younger kids. Others want a true treehouse suspension bridge with a little wobble.
Fixed Plank Bridge
This uses wood planks attached to side supports. It feels more stable and works well for younger children.
Suspended Rope Bridge
This has ropes or cables supporting the walking surface. It gives that classic swinging bridge feeling, but it needs better anchoring and stronger materials.
Net Bridge
A net bridge uses rope netting as the walking or side structure. It can be fun, but it must be tight, strong, and properly secured.
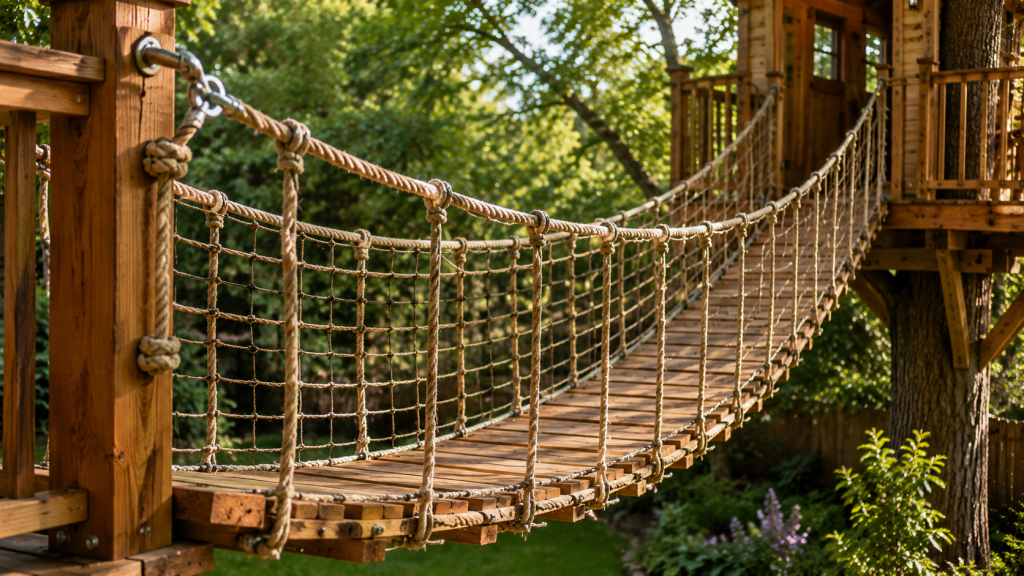
For most backyard builds, a semi-rigid bridge with wood planks, side ropes, and safety netting gives the best mix of fun and control.
Measure The Span Before You Buy Materials
The span is the distance between the two anchor points. Do not guess it. Measure it.
A short bridge of 6 to 8 feet is much easier to build and control than a 15-foot bridge. Longer bridges sag more, move more, and place greater force on anchors.
A helpful rule: start smaller than your imagination wants. Your imagination will say, “Let’s build a 30-foot jungle bridge.” Your budget and safety plan may gently whisper, “Let’s maybe not.”
Pick Strong Anchor Points
A Treehouse Rope Bridge is only as strong as what holds it.
If you use trees, they must be healthy, mature, and large enough to handle load and movement. Avoid dead limbs, cracked trunks, shallow roots, or trees with fungus. If you use posts, set them deep, brace them well, and choose weather-resistant lumber.
Tree Anchors Vs. Post Anchors
Tree anchors can look more natural, but trees move and grow. Posts give you more control, especially for a planned backyard play structure.
Never wrap tight ropes around a tree and leave them to bite into the bark. Use tree-friendly hardware or consult someone who understands treehouse attachments.
Choose Rope, Cable, And Wood Carefully
Materials matter. Outdoor bridges face rain, sun, temperature changes, and plenty of enthusiastic stomping.
Use rot-resistant wood such as cedar or redwood, or outdoor-rated treated lumber. CPSC guidance also recommends outdoor playground wood that resists insects and decay, while avoiding creosote-treated wood and pesticide-containing coatings.
For rope, choose outdoor-rated rope with a high working load limit. Many builders use marine-grade rope, polyester rope, or steel cable for hidden strength. Rope looks rustic, but steel cable often handles structural tension better.
Build A Stable Walking Surface
The bridge deck should feel steady underfoot. Wood planks are common because they are easy to replace and simple to grip.
Keep plank spacing narrow enough that small feet cannot slip through. Also, sand rough edges. A bridge should create memories, not splinters.
Practical Deck Tips
Use:
- Weather-resistant planks
- Galvanized or stainless hardware
- Locking nuts or washers
- Non-slip strips if the area gets wet
- Even spacing from one plank to the next
If the bridge will be used by younger kids, make it wider and less wobbly.
Add Handrails And Side Netting
Handrails are not decoration. They are part of the safety system.
For a backyard rope bridge, side ropes should sit at a comfortable grabbing height. Side netting can help prevent slips, especially when kids get excited and forget they are not tiny stunt doubles.
The CPSC home playground checklist also warns that openings should not trap a child’s head or neck. Openings should either be smaller than 3½ inches or larger than 9 inches. Keep that in mind when choosing side netting or rail spacing.
Install Protective Surfacing Below
This is the part people often skip because it is not as exciting as the bridge itself. Please do not skip it.
CPSC recommends shock-absorbing surfacing under and around home playground equipment. For many play structures, protective surfacing should extend at least 6 feet in all directions. The guidance also notes that concrete, asphalt, grass, dirt, carpeting, and thin mats are not proper protective surfacing.
Good options include:
- Engineered wood fiber
- Wood chips
- Shredded rubber mulch
- Approved playground mats
- Sand or pea gravel for lower-height equipment
The softer landing zone is not a “nice extra.” It is part of the build.
Step-By-Step: How To Build A Treehouse Rope Bridge
Here is the simple version of the process.
1. Plan The Route
Choose where the bridge starts and ends. Keep the span short if this is your first build.
2. Inspect The Supports
Check trees or posts for strength. If anything feels questionable, stop and ask a professional.
3. Install Main Support Lines
Use strong rope or cable between the anchor points. Keep tension even on both sides.
4. Attach Deck Planks
Secure each plank to the support system. Use outdoor-rated fasteners and check that every board sits level.
5. Add Handrails
Install side ropes or rails at a safe height. Make them easy to grip.
6. Add Safety Netting
Attach netting along both sides. Keep openings safe and consistent.
7. Test Slowly
Start with light pressure. Then test with adult weight before children use it.
8. Supervise First Use
Let kids cross one at a time at first. Teach them to hold the ropes, walk slowly, and avoid bouncing.
Common Mistakes To Avoid
The biggest mistake is building for looks instead of load. A bridge can look adorable in photos and still be poorly anchored.
Avoid:
- Weak posts
- Loose knots
- Indoor rope
- Wide gaps between planks
- No side netting
- Hard ground underneath
- Too much bridge sag
- Letting too many kids cross at once
Another mistake? Forgetting maintenance. Outdoor play equipment is not a “set it and forget it” project.
Maintenance Checklist For A Backyard Rope Bridge
Check the bridge every month during heavy use.
Look for:
- Loose bolts
- Frayed rope
- Soft or cracked wood
- Rusted hardware
- Sagging lines
- Wobbly anchors
- Worn safety netting
- Compact or displaced surfacing
The CPSC checklist recommends checking nuts, bolts, caps, swing seats, ropes, chains, and cables periodically, then replacing parts when needed. That same mindset works beautifully for a rope bridge.
Design Ideas To Make It Feel Special
A Treehouse Rope Bridge can be practical and beautiful. Add little touches that make the whole setup feel intentional.
Try:
- Solar lanterns nearby
- A small landing deck
- Natural wood stain
- Side netting in earthy tones
- A “lookout” platform at the end
- A matching playhouse or fort entrance
If you are still building the larger play zone, you may also love these ideas for a wooden outdoor playhouse that can pair nicely with a bridge-style backyard layout.
Best Products For A Treehouse Rope Bridge Project
These products can help with bridge inspiration, access, safety netting, or climbing-style add-ons. Always check the current product details, dimensions, and manufacturer instructions before buying.
HARERNET Outdoor Bridge Rope Ladder For Kids
This bridge-style rope ladder uses solid wood steps and nylon rope. It is a ready-made option for backyard obstacle courses, treehouse areas, and play zones. Features include a 19.6-foot length, 18 steps, and a listed 660-pound capacity. It works well for families who want a prebuilt bridge accessory rather than starting fully from scratch.
KKYOYRE Climbing Rope Bridge, 4M/13.12FT Solid Wood Bridge
This compact rope bridge is designed for smaller backyard spaces. It can work between trees, posts, or play structures when installed correctly. It is best for families who want the look of a classic bridge without building every part separately.
Outdoor Climbing Rope Net, 9.8×9.8ft Treehouse Ladder Bridge
This heavy-duty climbing net can support treehouse play, climbing walls, or bridge-style play layouts. The product listing describes a durable 10mm safety mesh for backyard, playground, or gym use. It is useful for side netting, climbing access, or creative play zones.
Dovacs Climbing Net For Kids Outdoor Handmade Multi-Colored Bridge
This colorful climbing net has a handmade look and can add a playful touch to a treehouse area. The listing notes a suggested load of 300 pounds and a maximum static load of 500 pounds. It is a fun option for kids who enjoy climbing, balancing, and obstacle-style backyard play.
JumpTrzz Climbing Cargo Net Heavy Duty Large Military Net
This polyester cargo net is made for outdoor play areas, jungle gyms, swing sets, and treehouses. It can be used as a climbing feature or safety-style netting depending on the project. It is best for active kids who want a more adventurous play setup.

Research-Backed Safety And Play Benefits
A Treehouse Rope Bridge should feel adventurous, but still be built with safety in mind. The U.S. Consumer Product Safety Commission reports that falls cause most home playground injuries, which makes strong anchors, safe height, and soft ground surfacing essential. Use this source as the safety net every backyard bridge needs.
Outdoor play also has real benefits. The Canadian Paediatric Society explains that manageable risk helps kids build confidence, balance, and decision-making skills. That is exactly why a well-built rope bridge can be more than just fun. Use this source as where brave play meets smart supervision.
Is This A DIY Project Or A Hire-A-Pro Job?
A short, low bridge between two sturdy platforms may be manageable for a skilled DIYer. But if the bridge is high, long, heavily loaded, or attached to living trees, hire help.
Call a professional if:
- The span is long
- The bridge is more than a few feet high
- Adults will use it often
- The trees need assessment
- You are unsure about load ratings
- Your local rules require permits
There is no shame in bringing in a pro. Honestly, “I hired someone so the bridge would not become a backyard trebuchet” is a very reasonable sentence.
FAQs About Building A Treehouse Rope Bridge
How high should a Treehouse Rope Bridge be for kids?
For younger children, lower is better. A low bridge still feels adventurous but reduces fall risk. The exact height depends on age, supervision, surfacing, and local safety rules.
What is the safest material for a backyard rope bridge?
Use outdoor-rated rope or cable, weather-resistant wood, corrosion-resistant hardware, and strong anchors. Avoid indoor rope, untreated soft wood, and cheap fasteners that can rust or loosen.
Can I attach a rope bridge directly to a tree?
You can, but only if the tree is healthy and large enough. Use tree-friendly hardware and avoid tight wraps that damage bark. For higher or longer bridges, ask an arborist or treehouse builder.
How much weight should a treehouse bridge hold?
The bridge should support more than the heaviest expected load, including movement and multiple users. Check all product ratings and hardware limits. When unsure, consult a structural professional.
How often should I inspect a treehouse rope bridge?
Inspect it at least monthly during active seasons. Check rope, boards, bolts, anchors, side netting, and surfacing. After storms or heavy use, inspect it again before anyone crosses.