How to Build a Treehouse: A Practical Step-by-Step Guide
We may earn a commission for purchases made using our links. Please see our disclosure to learn more.
Learning how to build a treehouse sounds simple: choose a sturdy tree, add a platform, and enjoy the view. A reliable build, however, depends on tree health, loads, attachment hardware, weather, access, and fall protection. A charming sketch cannot compensate for a weak trunk or improvised connection.
This guide explains how to assess the site, choose a manageable design, frame the platform, add guards, select useful tools, and plan inspections. It also shows when arborist or engineering advice matters, helping you create a treehouse suited to your skills, property, and intended users. Careful planning now prevents expensive corrections once the platform rises.
Affiliate disclosure: This article may earn a commission from qualifying purchases, at no extra cost to you. Recommendations are selected for practical relevance and verified features.
How to Build a Treehouse: Start With the Right Goal
Decide who will use the structure and what they will do there. A children’s platform needs different access, guards, and capacity than an adult reading room. List the occupants, furniture, roof, floor area, and height.
For a first project, choose a compact rectangle with simple walls or none. Lower, lighter structures are easier to frame, inspect, and maintain. When learning how to build a treehouse, a modest design is usually the wiser teacher.
Check Permits, Property Lines, and Neighbor Concerns
A local authority may classify a treehouse as a play structure, deck, accessory building, or room. Ask about permits, setbacks, height, guards, utilities, and inspections. Check association rules, easements, septic areas, buried services, and overhead lines.
Confirm the property boundary instead of guessing from a fence. Consider privacy too: a legal platform may still upset neighbors if it overlooks their home. Sleeping space, plumbing, electricity, or public access usually requires professional guidance and stricter approval.
Choose a Healthy Tree and Ask an Arborist
Look for a mature tree with a healthy crown, stable roots, sound trunk, and no obvious cavities, large cracks, fungal growth, dead leaders, or disturbed soil.
Diameter alone does not establish suitability. Species, defects, roots, wind exposure, attachments, and loads also matter. A certified arborist can identify hidden concerns and assess the proposed attachment zone before you decide how to build a treehouse around that trunk.
Pick a Design That Matches Your Skills
A level platform, simple walls, and a lightweight shed roof are easier than cantilevers, rope bridges, curved framing, or multiple levels. Use a professionally prepared plan matching your trees.
Do not casually adapt a one-tree plan to two trees. Separate trunks sway independently, so rigid connections can transfer damaging forces into the structure. When you cannot size beams, joists, braces, posts, and connections confidently, ask a structural engineer to review the design. Gravity ignores whimsy.
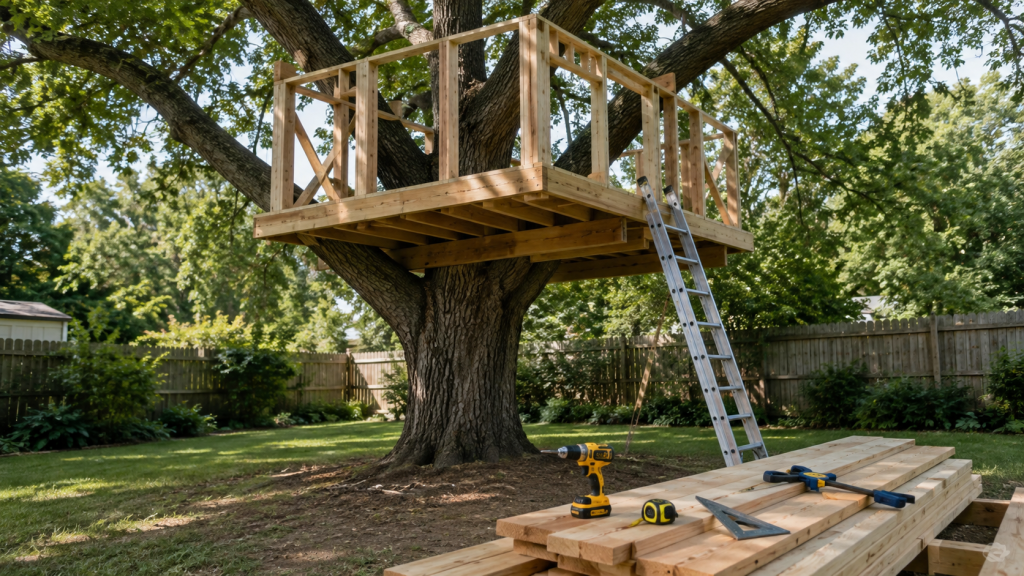
Plan Loads, Tree Movement, and Attachment Points
Account for the structure, occupants, furniture, wind, snow where relevant, and uneven loading. Enclosing a platform adds weight and wind area.
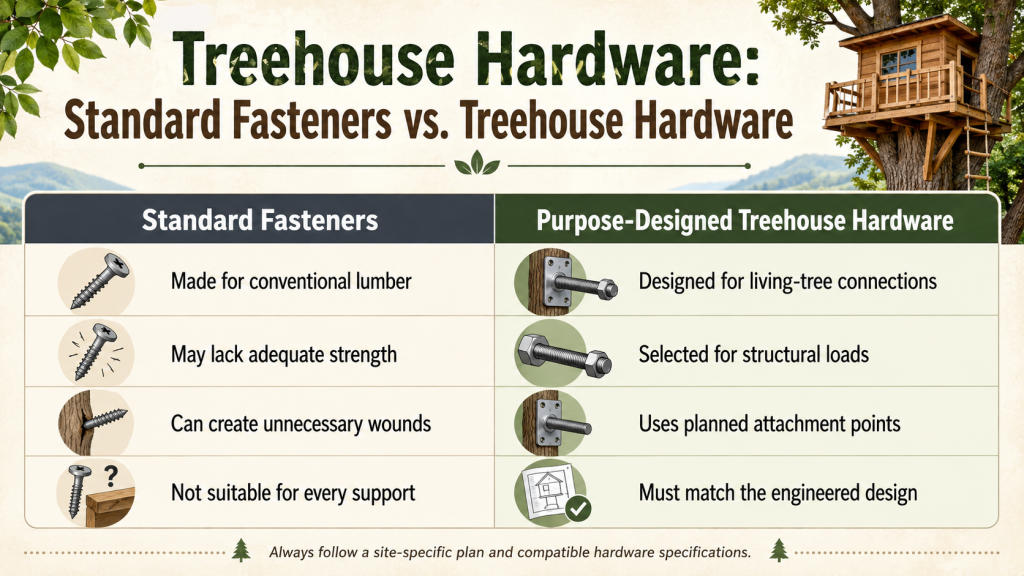
Follow the plan’s bolt size, bracket type, embedment, spacing, and orientation; never copy hardware placement from a photograph. Tree-supported designs often combine fixed and movement-accommodating connections. Minimize planned wounds and preserve clearance around trunks and branches. That discipline belongs in every guide to how to build a treehouse responsibly.
Gather Lumber, Hardware, and Essential Tools
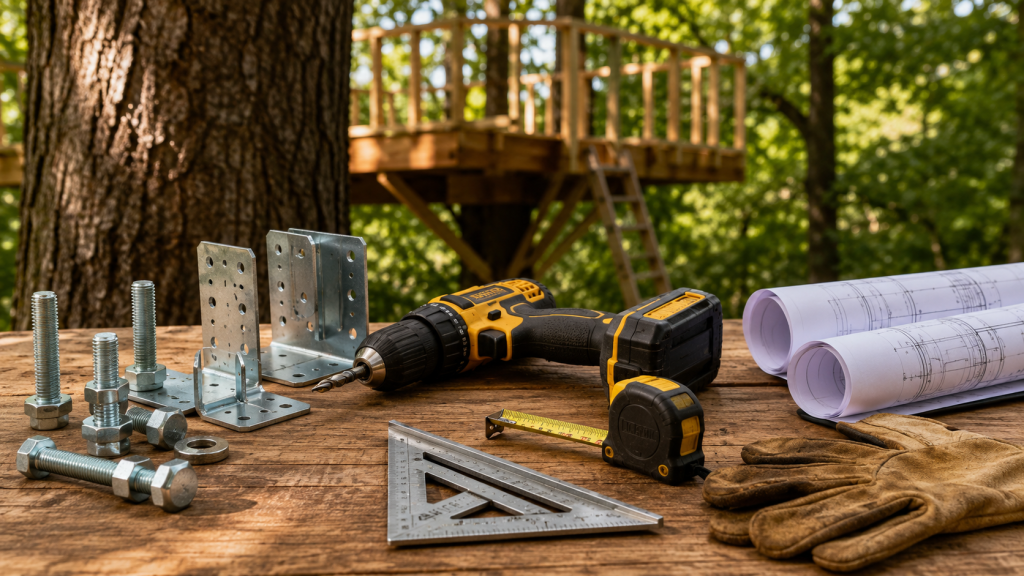
Create a cut list and hardware schedule from the plan. You may need exterior structural lumber, decking, corrosion-compatible fasteners, hangers, flashing, and purpose-designed tree attachments.
Typical tools include a tape, level, square, drill/driver, saw, wrenches, clamps, and suitable access equipment. Large tree bolts may require specialty bits and more torque than a household drill.
Cut, label, and preassemble parts on the ground whenever possible. Careful staging reduces mistakes and tool handling at height.
How to Build a Treehouse Platform
Transfer the attachment elevations, then install specified tree or post hardware using the required bits, depth, brackets, and tools. Never substitute smaller bolts or relocate a drilled hole without advice.
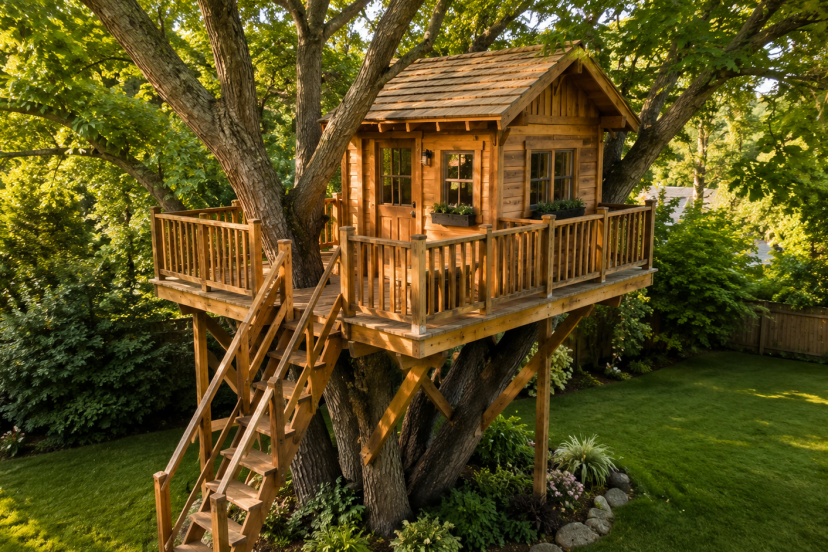
Set and temporarily brace the beams. Assemble the perimeter, compare diagonals, install joists and blocking, then inspect every connection before decking. Preserve movement gaps around trunks and drainage gaps between boards.
For added detail, use The Treehouse Nest’s step-by-step treehouse platform guide alongside your plan.
How to Build a Treehouse Floor, Walls, and Roof
Frame manageable wall sections on the ground, lift them with adequate help, brace them plumb, and follow the plan’s fastening schedule. Add headers where openings interrupt framing; never treat trim as structural support.
A sloped roof usually sheds water better than a nearly flat one. Include overhangs, drip edges, and flashing. Preserve movement clearance around trunks and branches rather than fastening roofing tightly to living wood. Roof detailing matters when deciding how to build a treehouse that lasts.
Add Safe Access, Railings, and Fall Protection
Design access for the youngest user. Stairs with consistent treads and handrails may work better than a vertical ladder. Secure any ladder, provide firm footing, and keep its opening away from an exposed edge.
Guard posts must connect to framing, not merely deck boards. Openings should discourage climbing and reduce entrapment, while bolts and sharp edges should not protrude into play areas. Clear hard obstacles from fall zones and consider impact-absorbing surfacing. Surfacing cannot repair weak construction.
How to Build a Treehouse That Handles Weather
Help water drain and damp areas dry. Slope caps, protect end grain, flash joints, and avoid tight pockets between bark and lumber. A sealed cavity may trap more moisture than a ventilated detail.
Inspect seasonally and after major storms. Check fasteners, corrosion, soft wood, leaks, rubbing branches, shrinking trunk gaps, insects, and tree changes. Restrict access until concerning movement is evaluated. Maintenance is the recurring final step in how to build a treehouse.
Research-Backed Safety and Tree-Health Guidance
Treehouse research is limited, so guidance draws from arboriculture, playground safety, framing, and work-at-height principles. Purdue Extension explains that bark and cambium damage is irreversible and that trees compartmentalize wounds rather than healing like skin. The ISA recommends professional assessment when defects create risk.
Peer-reviewed arboriculture literature indicates that repeated wounds can breach compartmentalization boundaries and increase decay risk. This supports fewer attachments and no exploratory holes; no bolt layout suits every tree. See the ISA paper on wound compartmentalization.
The U.S. Consumer Product Safety Commission emphasizes falls, surfacing, guards, maintenance, protrusions, and entrapment in its playground safety handbook and playground checklist. These address playgrounds, but the principles transfer.
The American Wood Council’s deck resources explain conventional framing concepts but not tree-supported structures. OSHA’s ladder guidance is workplace-focused, yet level footing, facing the ladder, and three-point contact remain sensible habits.
Recommended Products for How to Build a Treehouse
These products serve different jobs. None replaces an arborist, approved plan, compatible hardware schedule, or safe work platform.
| Product | Main use | Limitation |
| CoreTAB bolt | Tree connection | Plan-specific |
| DEWALT DCD771C2 | Drilling and fastening | Limited for large bolts |
| Swanson S0101 | Layout | Not a level |
| IRWIN clamps | Alignment | Temporary only |
| Workmate WM125 | Ground assembly | Not scaffolding |
| Little Giant Velocity | Access | Setup matters |
CoreTAB™ – Treehouse Attachment Bolt 1.75″ x 15″
Best for: Builders using a compatible small-structure hardware plan
This heat-treated steel bolt has a 1.75-inch collar and 1.25-inch perch, and the manufacturer positions it for structures up to 100 square feet. Its purpose-built geometry is valuable, but selection and placement depend on the tree, loads, brackets, and engineering. It is not a universal fastener.
DEWALT 20V Max Cordless Drill Driver Set, 2 Speed, High Performance Motor, Includes 2 XR 1.3Ah Li-Ion Batteries, Charger and Contractor Bag (DCD771C2)
Best for: General DIY drilling and fastening
This compact drill/driver offers two speeds, a half-inch chuck, and two batteries for pilot holes, screws, and everyday framing. Portability suits backyard work. Specialized tree bolts may still require manufacturer-specified augers and a higher-torque corded drill rather than this general-purpose model.
SWANSON Tool Co S0101 7 Inch Speed Square, Blue | Made in the USA aluminum alloy rafter square w/ black embossed scales/degrees/scribing for spot-on measurements every time
Best for: Budget-friendly layout and repeatable marking
This seven-inch aluminum tool combines square, miter, saw-guide, scribing, and rafter-reference functions. Its markings help lay out joists, braces, and repeated cuts consistently. It is compact and inexpensive, although builders still need a reliable tape and level for platform dimensions and elevation.
IRWIN Quick-Grip 1964758 One-Handed Mini Bar Clamp 4 Pack, 6″, Blue
Best for: Solo builders aligning small parts
These four six-inch clamps have one-handed triggers, non-marring pads, reinforced resin bodies, and steel bars. They can hold blocking, trim, or light framing while you mark and fasten. Their short reach limits larger assemblies, and temporary clamps never count as permanent structural connections.
BLACK+DECKER Workmate Portable Workbench, 350-Pound Capacity (WM125)
Best for: Small yards without a permanent workshop
This folding workbench combines a steel frame, wooden vise jaws, and adjustable pegs. It provides a compact station for measuring, sanding, and holding boards, then stores flat. Despite its stated 350-pound capacity, it is strictly a workbench—not a ladder, scaffold, or elevated platform.
Little Giant Velocity, Aluminum Ladder, 18 ft Reach, 15417-001
Best for: Projects requiring several access configurations
This multi-position aluminum ladder supports stepladder, extension, and uneven-access arrangements and carries a Type IA 300-pound rating. Its flexibility helps at changing heights. It is substantial to move, and every setup requires locked hinges, firm level footing, correct positioning, and fall-aware work habits.
Common Mistakes That Shorten a Treehouse’s Life
Common mistakes include using ordinary deck screws as primary tree connections, drilling trial holes, rigidly joining independently moving trunks, and copying hardware spacing from unrelated projects.
Flat beam tops, unflashed joints, tight trunk cutouts, and debris-filled gaps also create hidden damp areas. Rail posts attached only to decking lack a dependable load path.
Trees grow, lumber shrinks, fasteners loosen, and storms expose weak details. A written inspection routine belongs in every plan for how to build a treehouse.
How to Build a Treehouse FAQ
Can I build a treehouse without harming the tree?
Every drilled attachment creates a wound, so “no harm” is not a realistic promise. Reduce unnecessary damage by choosing a healthy tree, minimizing attachment points, using purpose-designed hardware, avoiding repeated holes, preserving growth clearance, and monitoring the trunk. An arborist and site-specific plan offer a stronger basis than improvised fastening.
How large does a tree need to be?
No single trunk diameter guarantees suitability. Species, taper, defects, roots, soil, canopy condition, wind, platform size, and attachment loads affect the decision. A manufacturer’s minimum applies only to that hardware system and design. Ask an arborist to assess the tree and follow a professionally prepared or engineer-reviewed plan.
Do I need a permit for a treehouse?
Possibly. Requirements may depend on height, floor area, setbacks, utilities, occupancy, and whether the structure is a playset, deck, accessory building, or room. Contact the local building department and homeowners’ association before construction. Written guidance is more reliable than assumptions based on another town’s rules.
Is a one-tree or multi-tree design easier?
A one-tree design avoids differential movement but may need posts, braces, or cantilevers. Multiple trees offer broader support geometry, yet each sways independently and may require sliding connections. Many beginners find a professionally designed one-tree-and-post layout manageable because it limits tree attachments and keeps the platform straightforward.
How long does a basic treehouse take to build?
A straightforward platform may require several focused workdays after planning, approvals, tree assessment, and material preparation. Walls, roofing, stairs, difficult access, and custom hardware extend the schedule. Do not rush inspections or temporary bracing to meet a weekend deadline. Close access whenever the structure is incomplete while learning how to build a treehouse.
How to Build a Treehouse With Confidence
The clearest approach to how to build a treehouse is to settle high-consequence choices first. Verify local rules, have the tree assessed, select a plan matching the site, and use attachments designed for the expected loads and movement. Then build a square platform, add structurally connected guards and suitable access, manage water, and schedule inspections.
A Swanson square and dependable drill/driver can improve routine framing, while specialized hardware such as a CoreTAB belongs only in a compatible system. Different readers may choose different sizes and finishes, but the final recommendation stays the same: keep the first design modest, work from verified plans, and never improvise tree connections.